A billing event is a collection of charges marked as completed and ready to be billed. Creating a billing event allows core administrators the opportunity to review charges, update payment information for charges, and determine what charges they are ready to process.
- Create a New Billing Event
- Review Charges
- Save as a draft billing event
- Edit a draft billing event
- Merge draft billing events
- Summary Tab
Create a New Billing Event
To initiate a new billing event:
- Navigate to the Billing tab within your core page.
- Click on the New Billing Event button.
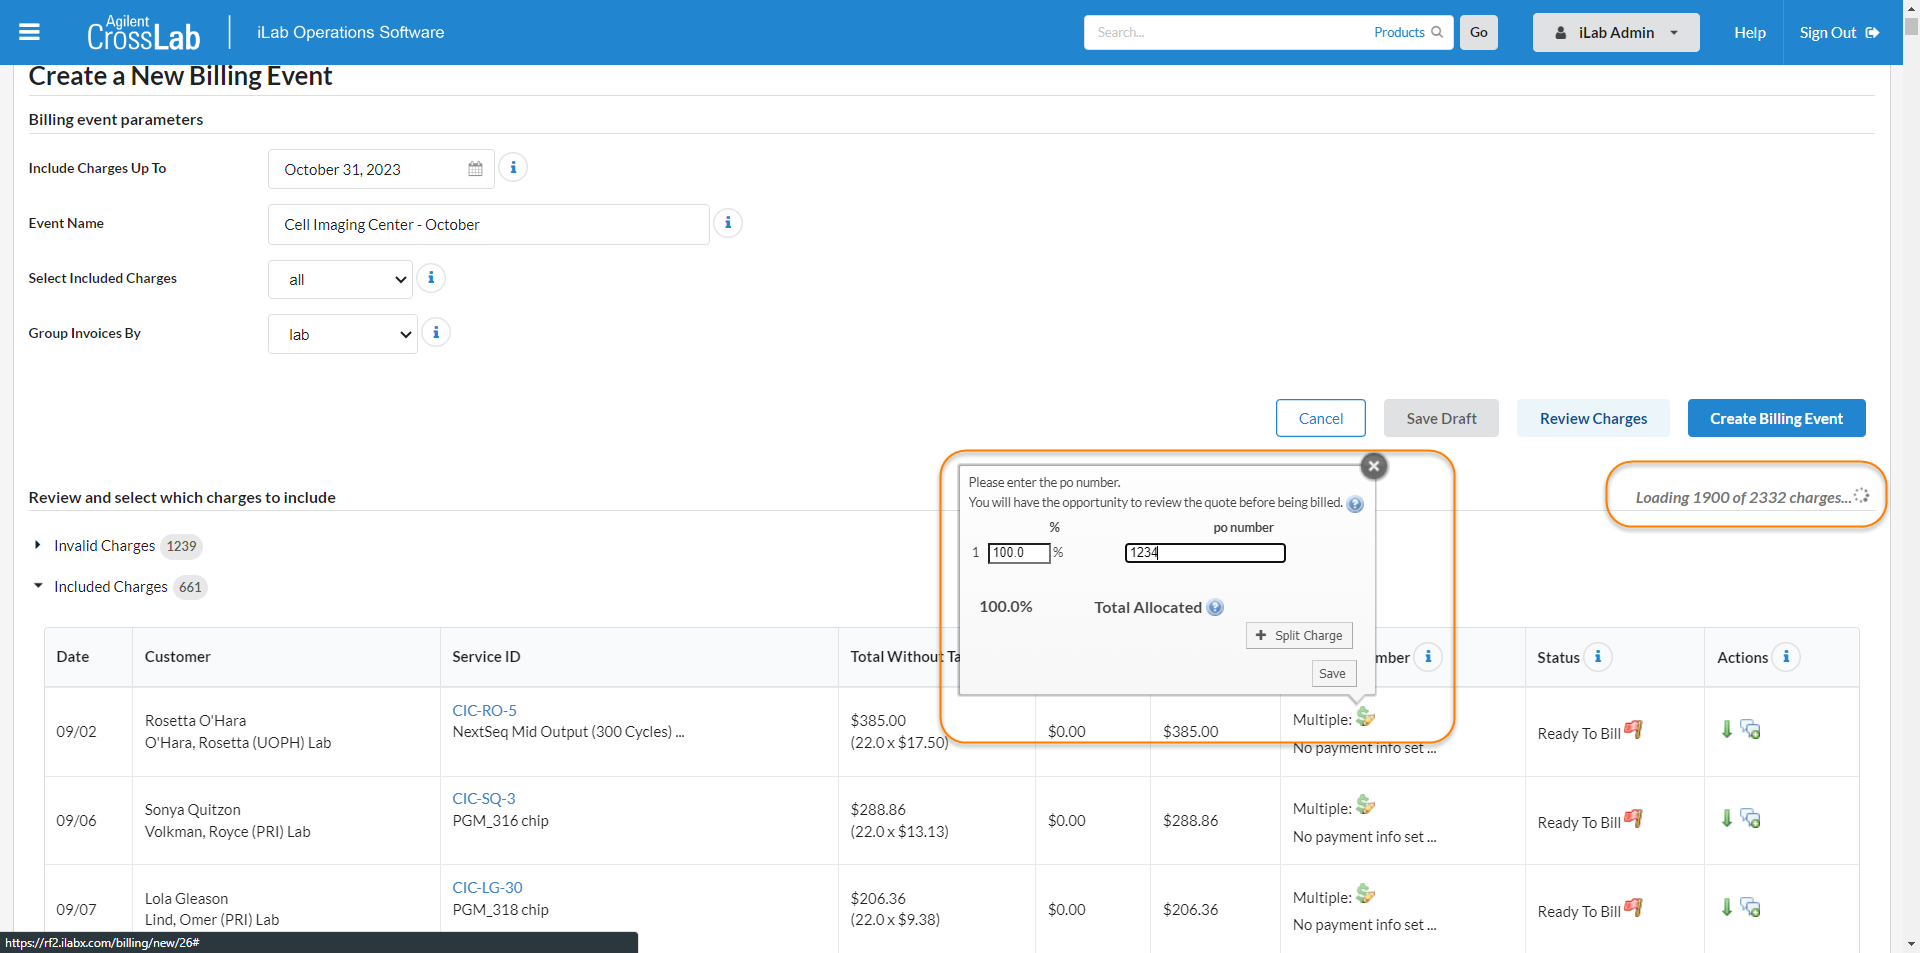
Clicking the Create Billing Event button will take you to a new page, which is composed of two main sections necessary for creating the event: the billing event parameters and the Action Buttons.

-
The Billing Event Parameters: This block is pre-populated with default settings, allowing users to immediately create a billing event with the use of preset parameters at the start of the process, bypassing the charge loading step entirely, or it ca be changed as needed. The following parameter can be selected:
- Include Charges Up To: All charges confirmed or completed on or before this date will be searched for.
- Event Name: Designate a name for this billing event. By default, the system will append the current month to the name of the core.
- Select Included Charges: Filter for internal charges or external charges. The default is "all".
-
Group Invoices By: Set how charges should be grouped when creating invoices. You can group by Lab, Researcher, Request ID, or Payment Info. By default, invoices are grouped by lab.
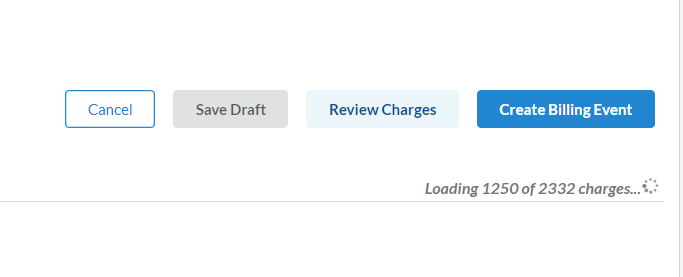
- The Action Buttons: Located at the bottom of the page, this section features a group of buttons that offer the following options: Cancel, Save Draft, Review Charges, and Create Billing Event. As you interact with these action buttons, a third section may become visible, which will be discussed further in this article.
Review Charges
Clicking the Review Charges button loads a section at the bottom of the screen titled >Review and select which charges to include. This area displays all charges that meet the event criteria.
Real-Time Data Loading
Upon initiating a new billing event, charges begin loading into a table viewable at the bottom of the page. The dynamic loading counter, visible in the top-right corner of the user interface, shows the number of charges loaded relative to the total expected.
This real-time data loading allows you to start editing charges immediately as they appear, enhancing workflow efficiency by enabling multitasking during the loading process.
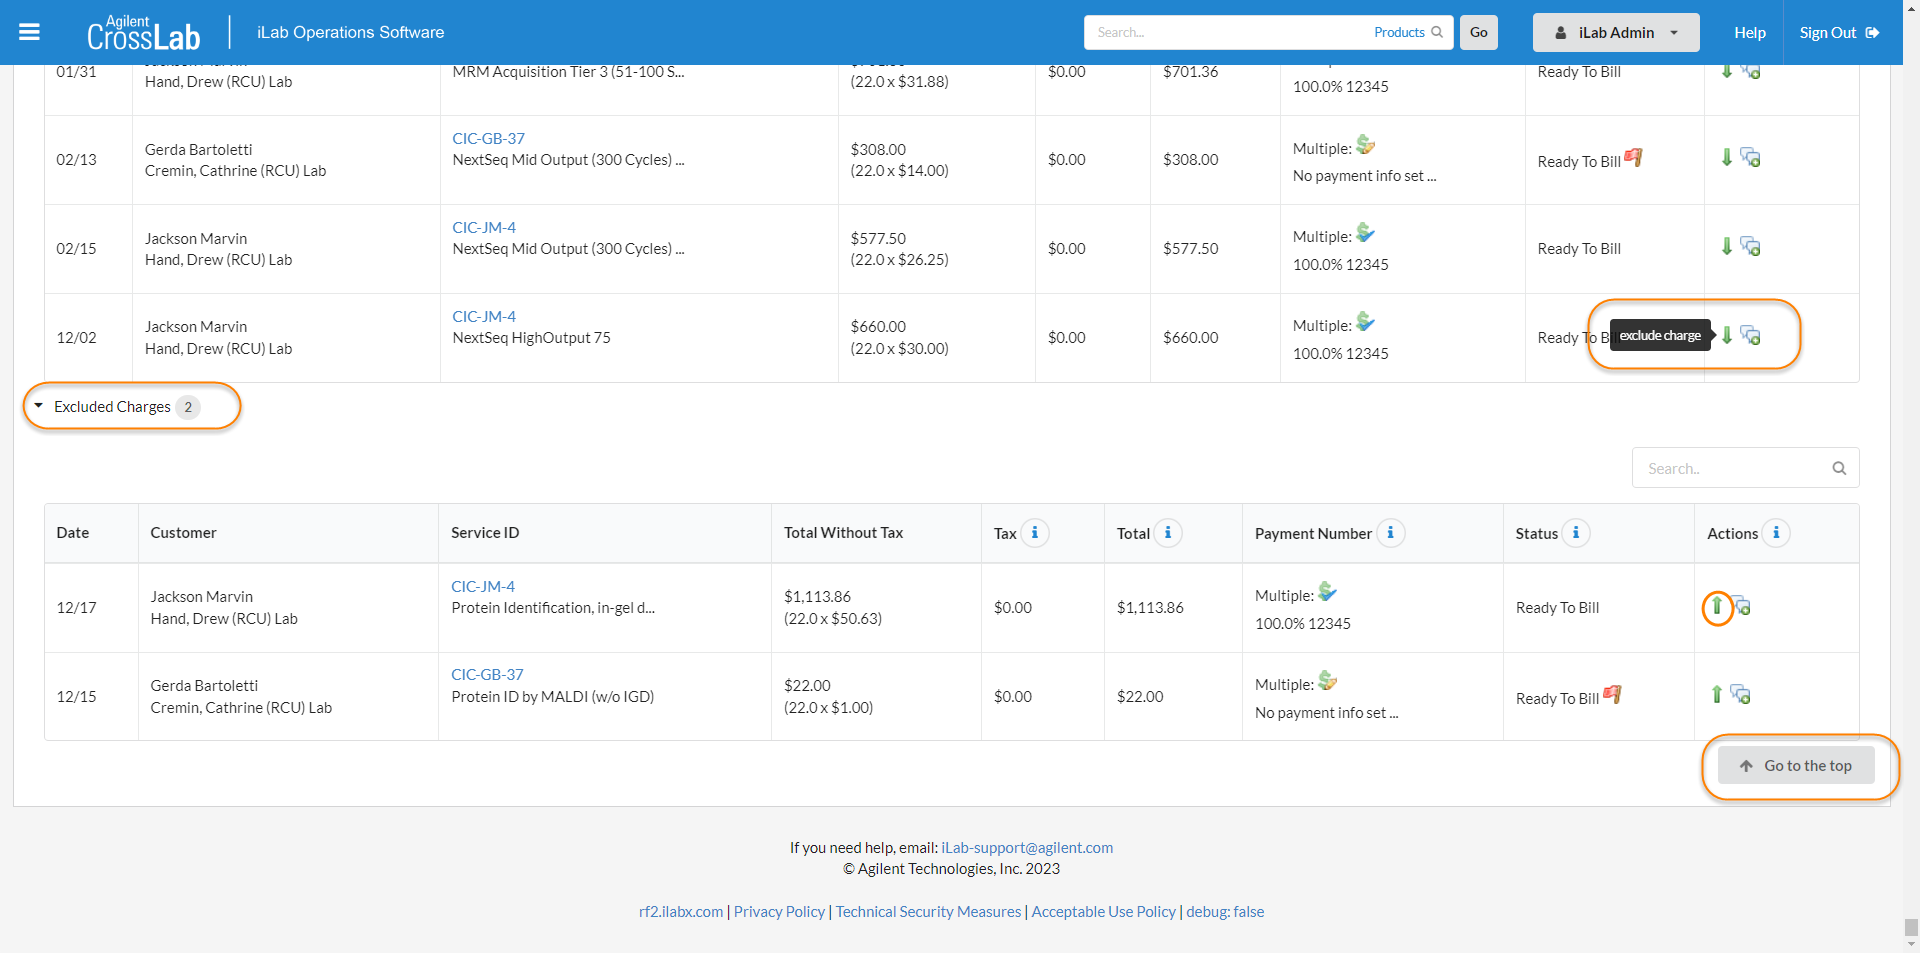
Managing the Charges
- Designate which charges will be included and which will excluded (if any).
Note: By default, all eligible charges are included. - To exclude a charge, click on the green down arrow beside the charge. This will move it to the excluded charges section.
- To include a charge that was previously excluded, click on the green up arrow. Similarly, the charge will display in the included charges section.
After reviewing and modifying charges as needed, you can use the action buttons to save your work as a draft, merge it with other drafts, or finalize the billing event.

Finalizing the Billing Event
After configuring the necessary settings:
-
Create the Billing Event:
Click the Create Billing Event button to finalize the creation process. You will automatically return to the main Billing tab. -
Monitoring Progress:
A progress bar appears, displaying the completion percentage of the billing event creation. This bar updates in real-time, ensuring that users viewing from different screens or browser sessions receive up-to-date information without needing to refresh the page.

Once the process is complete, you will be able to view the Summary of the billing event or the Invoices from the links listed.
Save as a Draft Billing Event
Saving billing events as a draft provides a core the flexibility to review and organize charges over the course of their billing cycle without committing charges to an invoice. This can be helpful for higher volume cores, or facilities that have longer billing cycles, or in cases where Institution Administration handles customer invoicing. Additionally, it gives institution administrators the ability to review charges before invoices are generated.
To save a draft, click the Save Draft button. You will be returned to the Billing tab where you can view the summary, edit charges, or finalize the billing event directly from the draft.
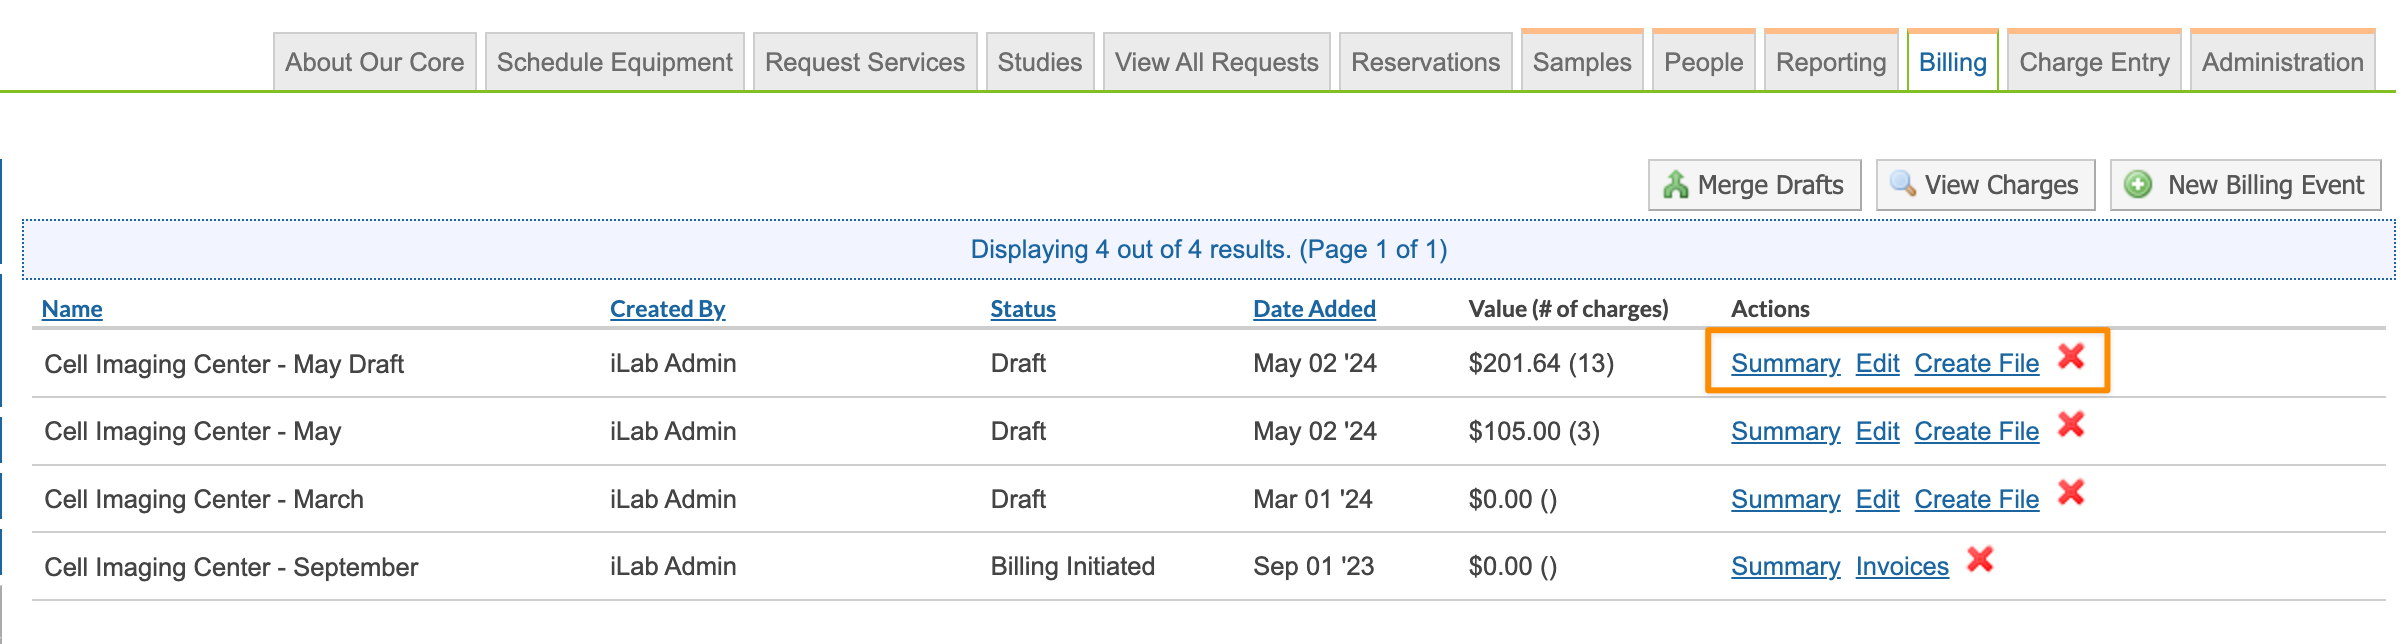
Edit a Draft Billing Event
When a draft billing event is created, a summary of your charges included in this event is visible from the "Summary" link. You can also continue to add charges to the billing event using the Edit link.
To edit a draft:
1. From the Billing tab, locate your draft event in the table.
2. Click the Edit link to revisit the Review Charges section, where you can continue modifying charges or finalize the event.
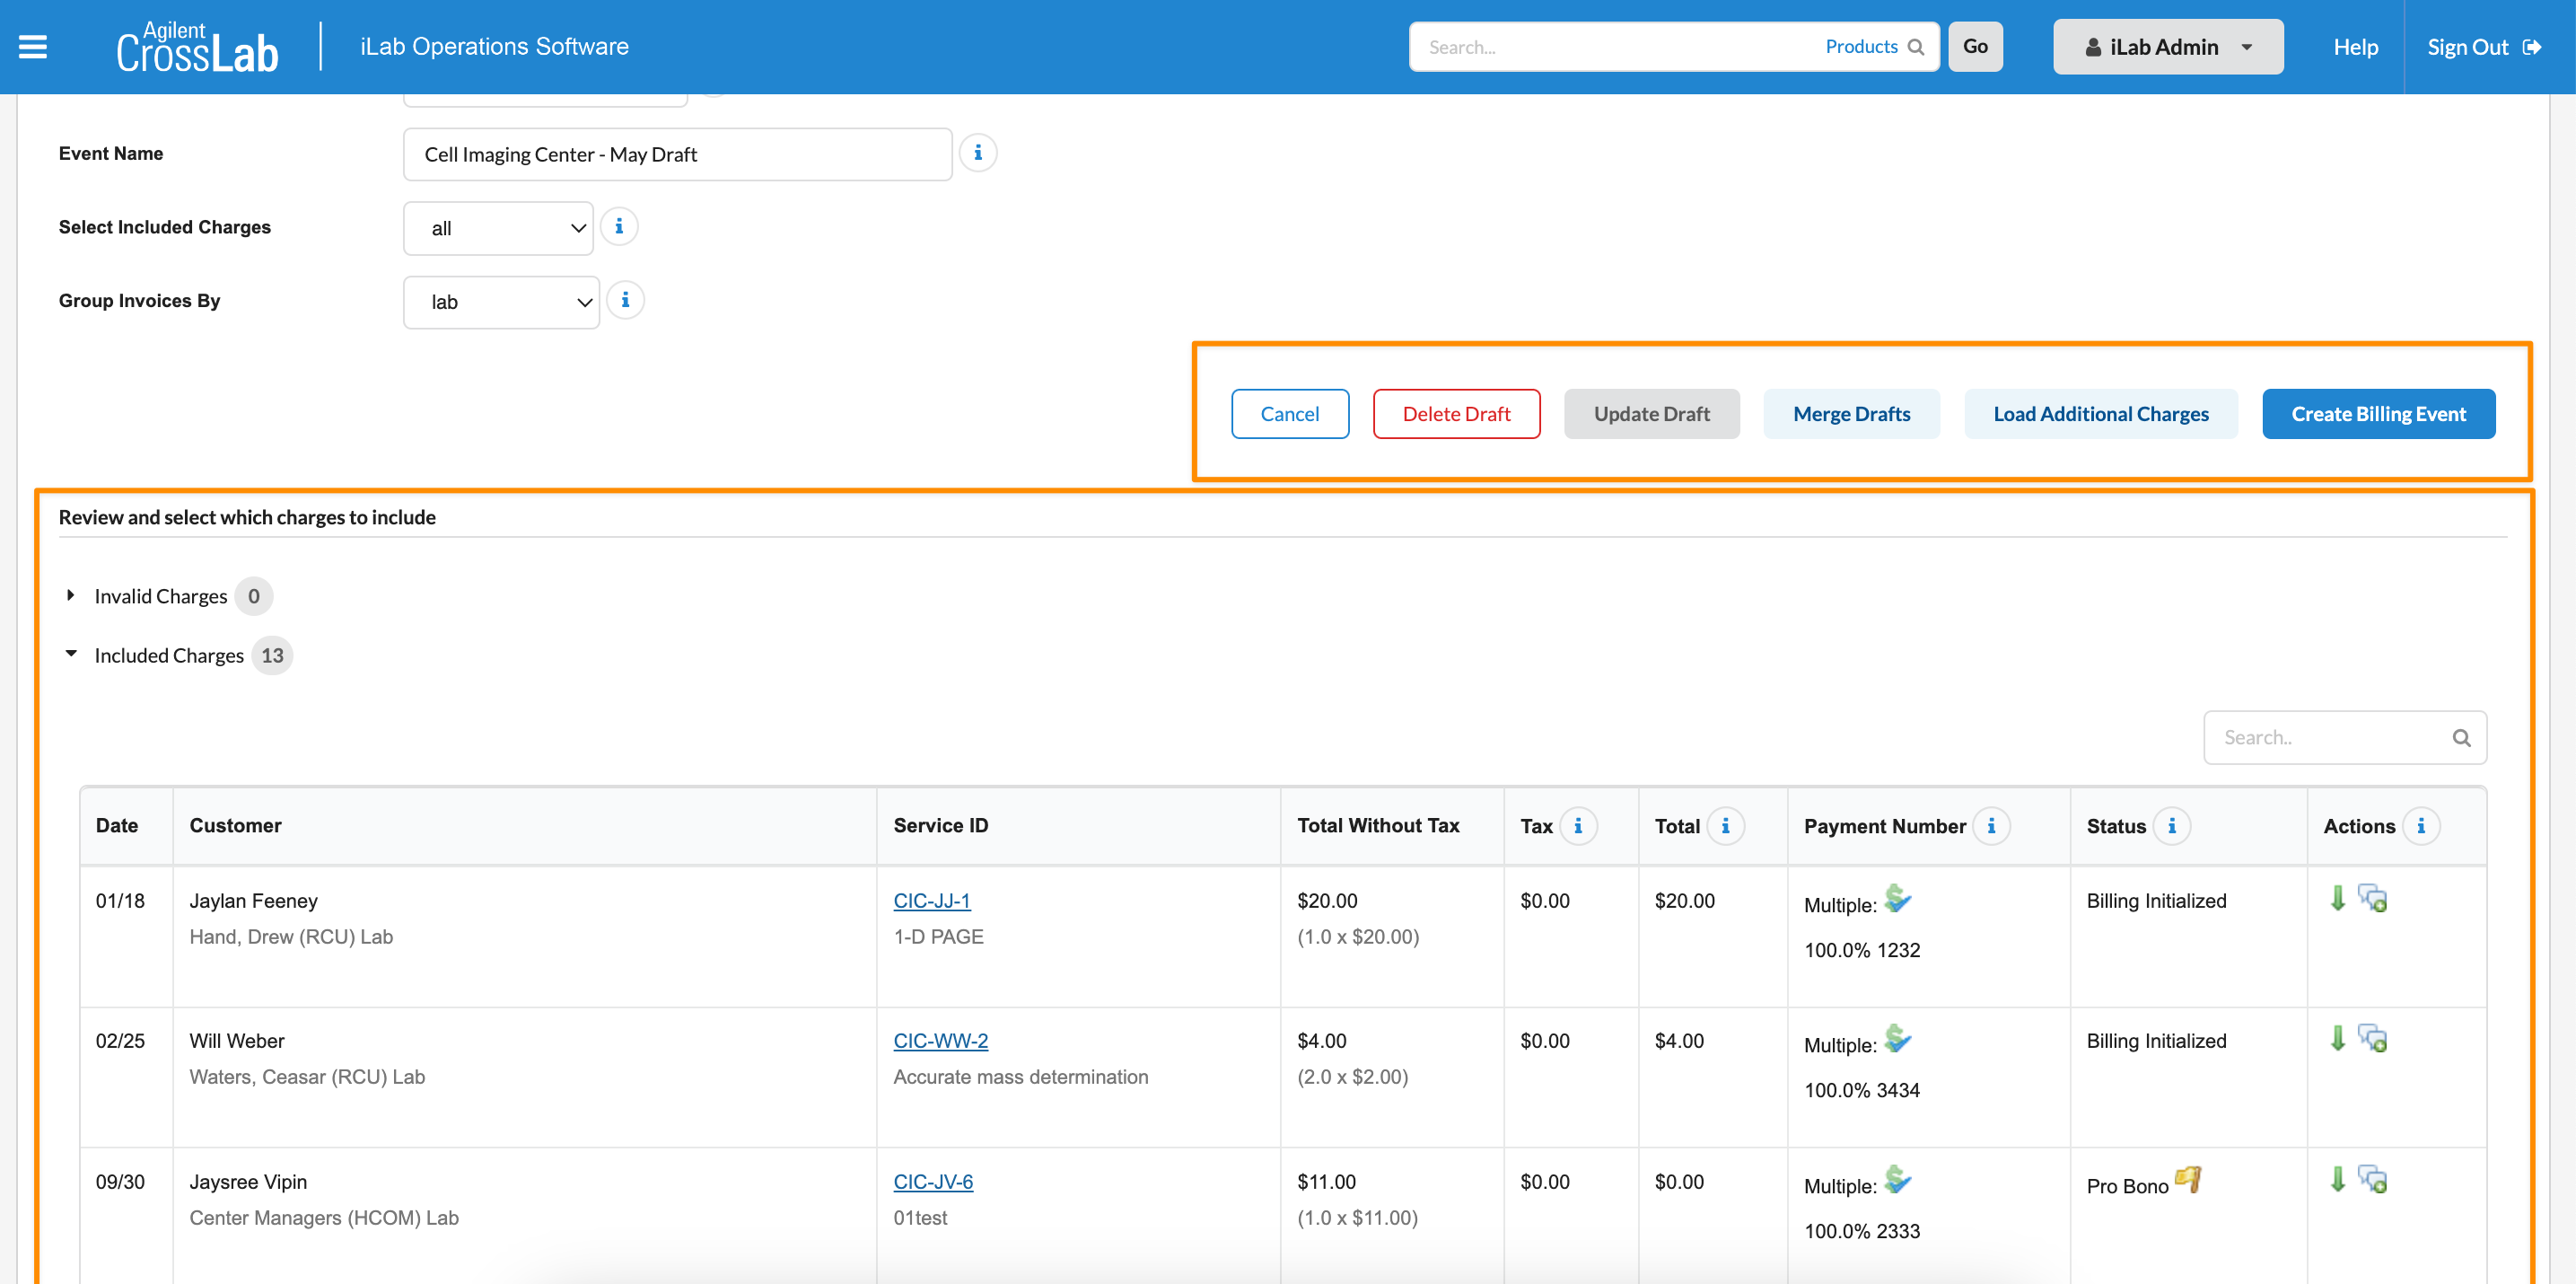
From the Edit Draft page, you have the option to edit and/or add charges.
Loading Additional Charges
From the Load Additional Charges button, you can set new parameters to include additional charges in this draft billing event.
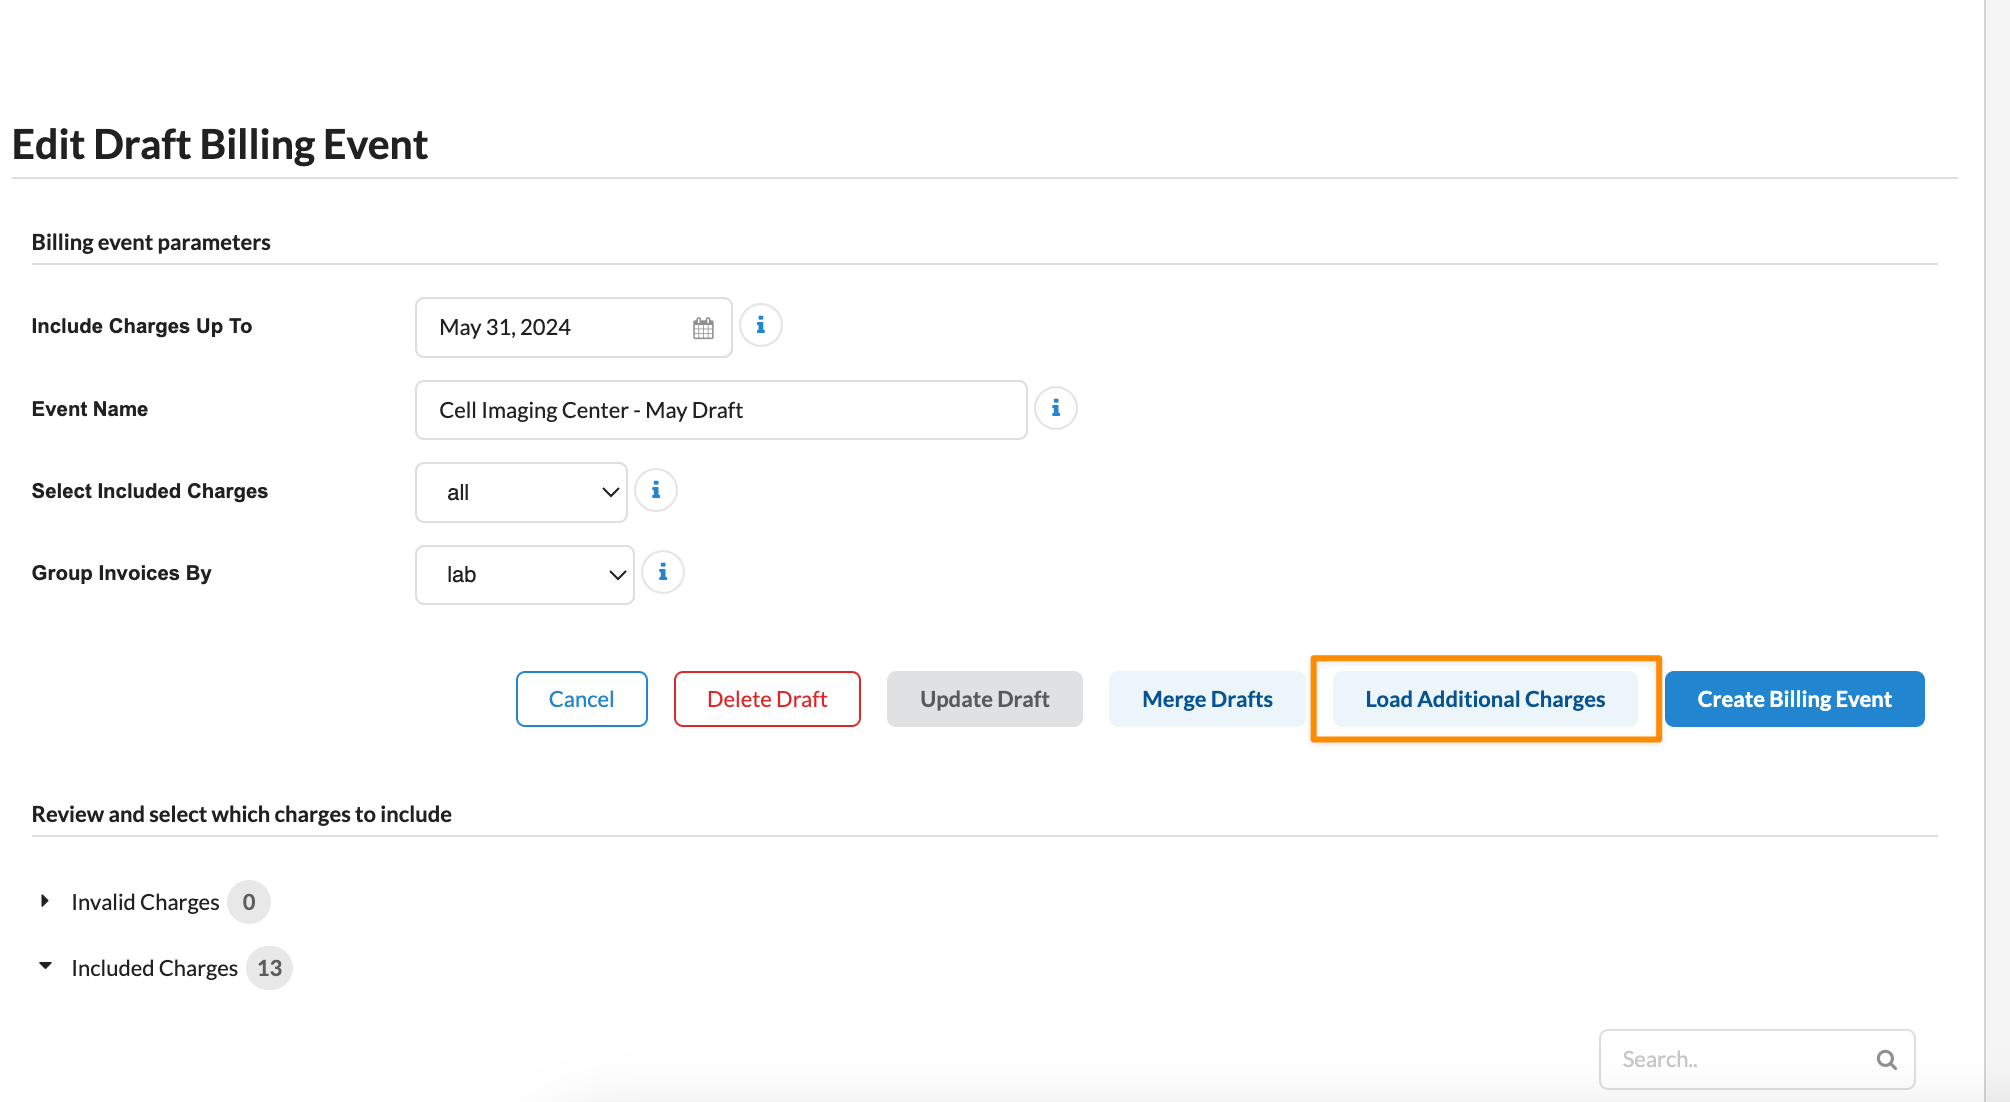
Save this event as a draft again by clicking the Update Draft button, or Create Billing Event, Delete Draft, Merge Drafts, or Cancel buttons according to your needs.

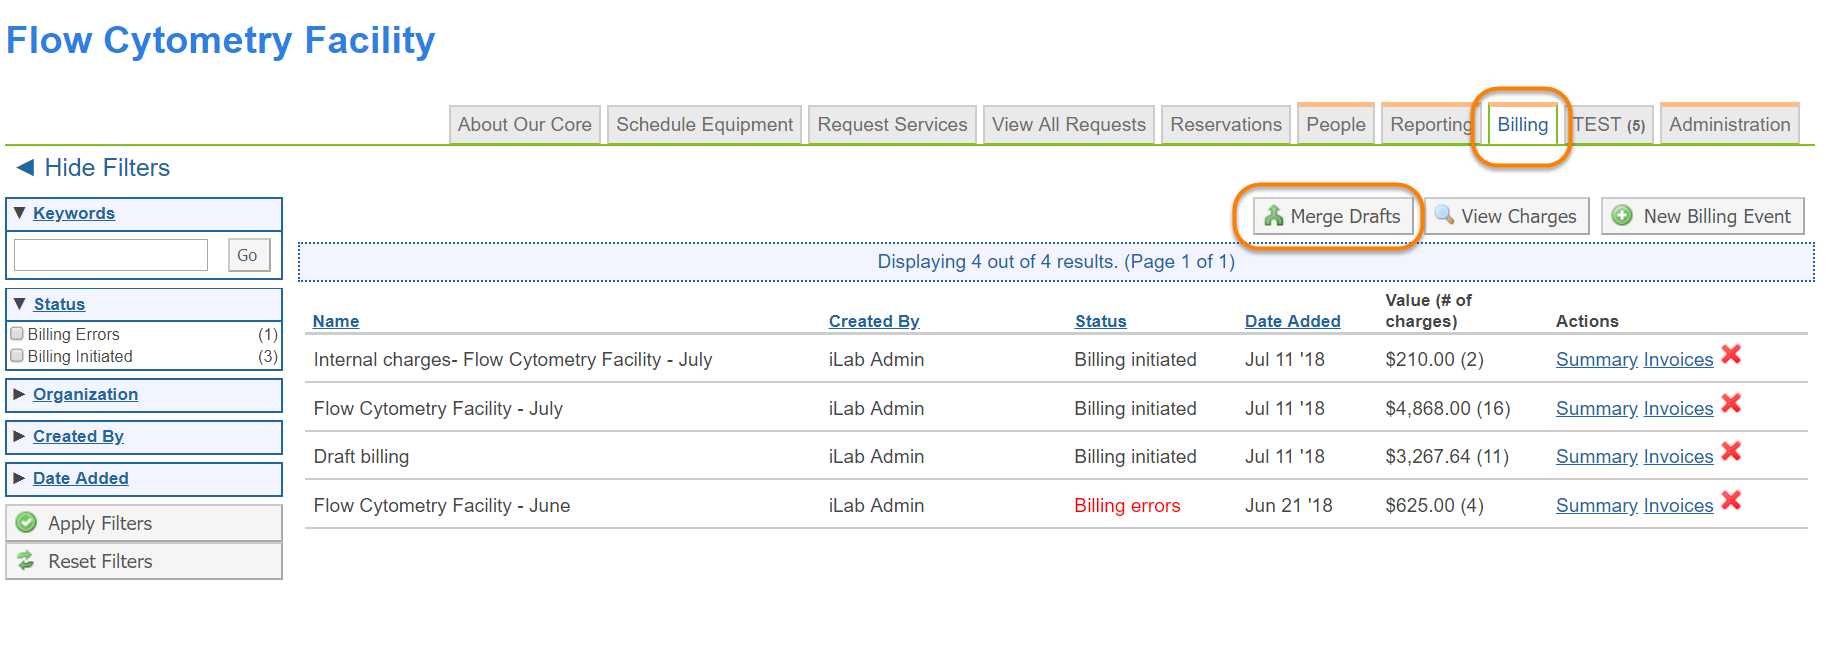
Merge Draft Billing Events
At times, core administrators have created multiple Draft billing events that need to be merged into one final billing event. On the Billing Tab, navigate to the Merge Drafts button. Only billing events from the same core with the same charge grouping on invoices can be merged. Select the events to combine and click the Merge Drafts button.

Summary Tab
The Summary tab gives an overview of the charges that are included in the billing event. The Summary tab also allows for the core administrator to send or download their billing file, and email institution administrators a PDF of the summary page.
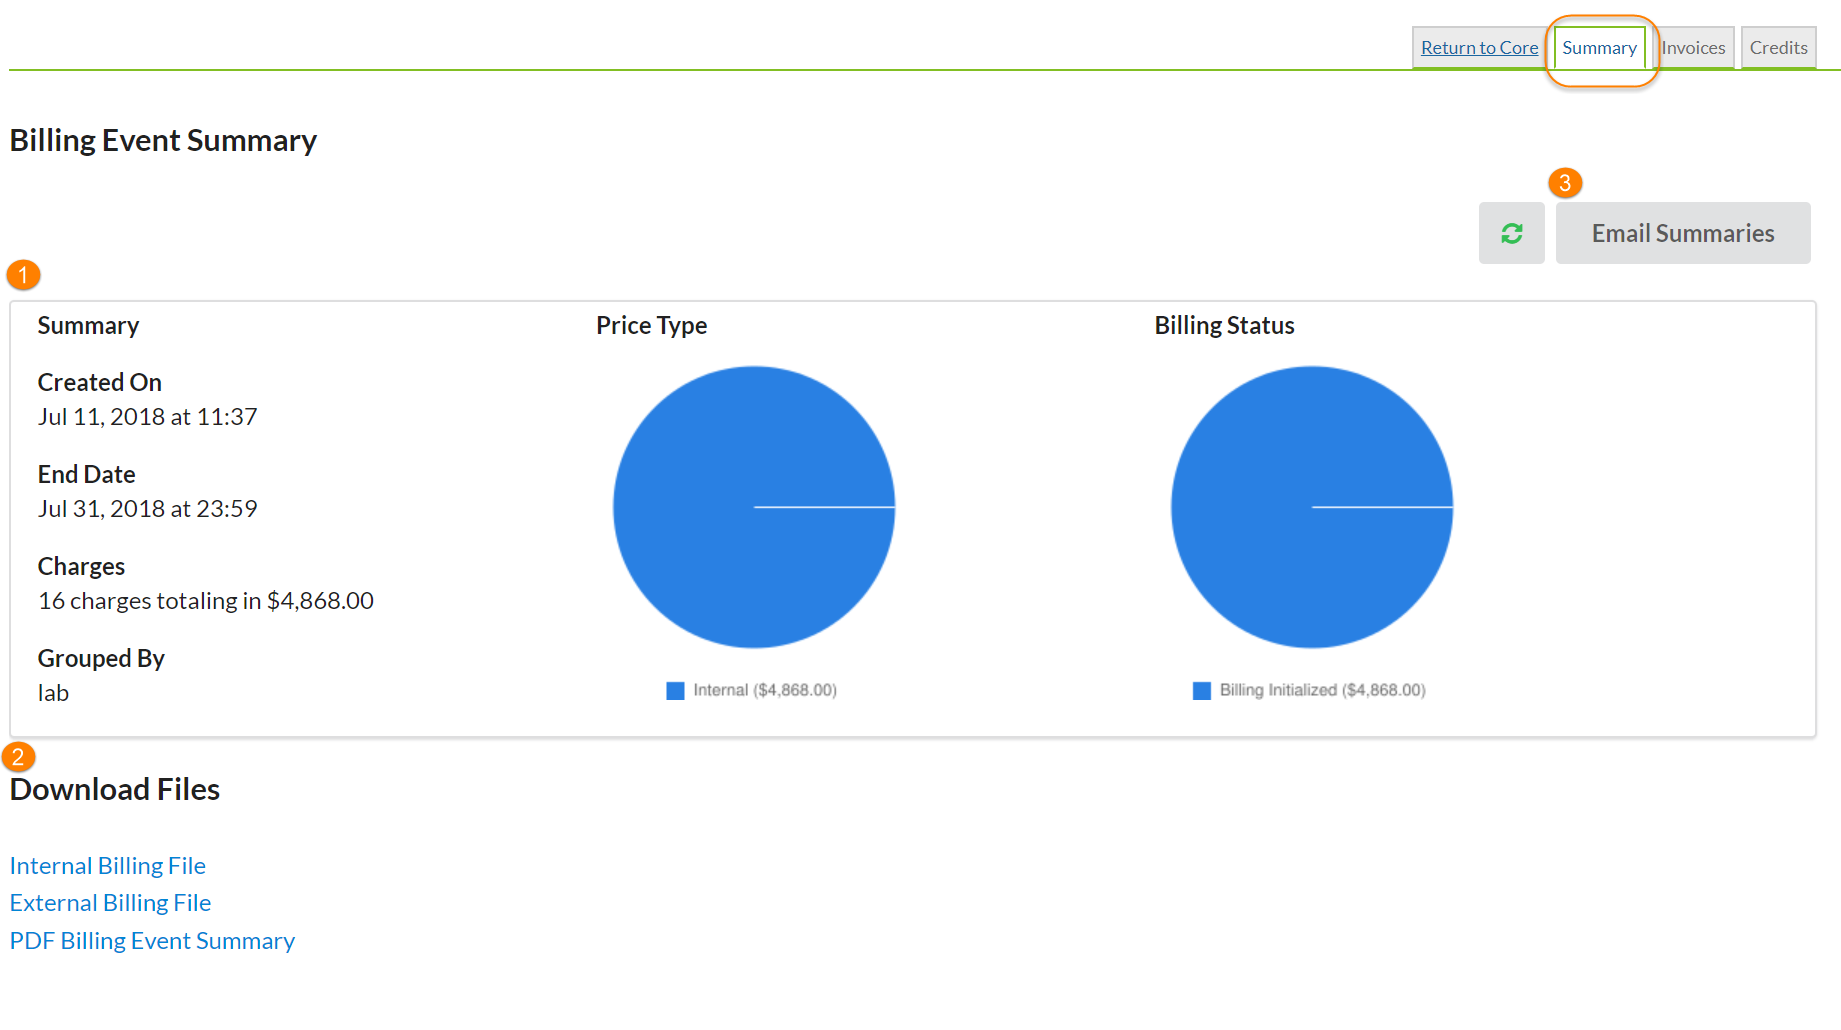
- Summary of Charges: This section outlines high-level information about the charges included in the billing event.
- Download Files: The core facility can download billing files. Note: For institutions with integrations, there will also be a button to send the billing file to the institution's billing system. File format may differ with integrations.
- Email Summaries: Send an email to institution administrators with the summary information included.