The request detail view provides an interface to edit various aspects of the request. From here, you can perform various actions.
- Accessing the Edit Request interface
- Cancel a Service Request
- Print a Service Request
- Assign a Service Request
- Update Service Request Dates
- Add Labels to a Service Request
- Get Direct Request Link
Accessing the Edit Request Interface
To the right of each service request, there is a yellow pencil icon that offers project management actions for each service request. Click on the yellow pencil icon to open the action options.

The actions interface will open. Note that certain actions are only actionable to Core Administrators.

Cancel a Service Request
Customers can cancel a request in a "Draft", Waiting for core to agree" or "Waiting for Researcher Approval" statuses by selecting the "Cancel" option from the Edit Request interface (red "stop sign" icon). After confirmation, the request will be canceled in iLab. Note: Requests cannot be deleted in iLab, only canceled.
Core Staff may cancel a request any time.
Print a Service Request
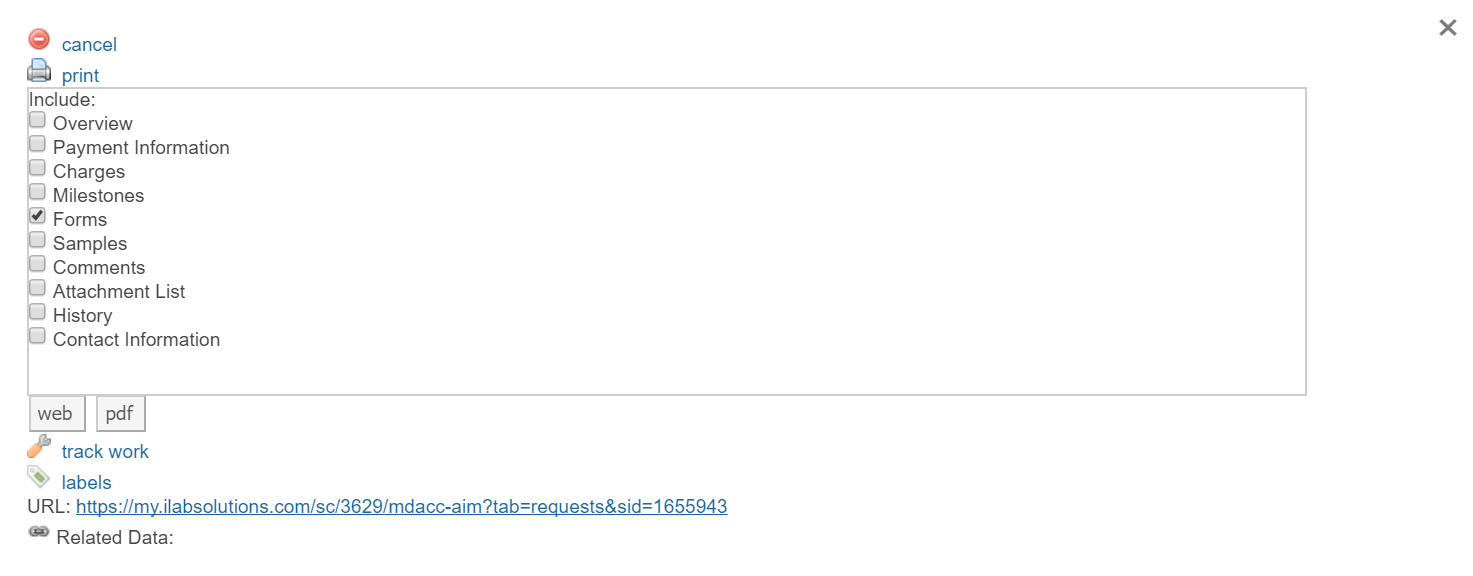
Any user may print a request using the "Print" action. This brings up an interface where you can select which elements of the request should be included. Next click on either the "web" button below to render as HTML (web page) or on the "pdf" button to generate a PDF file. Note: make sure that your browser allows you to open pop-ups to allow the rendered request to be visible.

Assign a Service Request
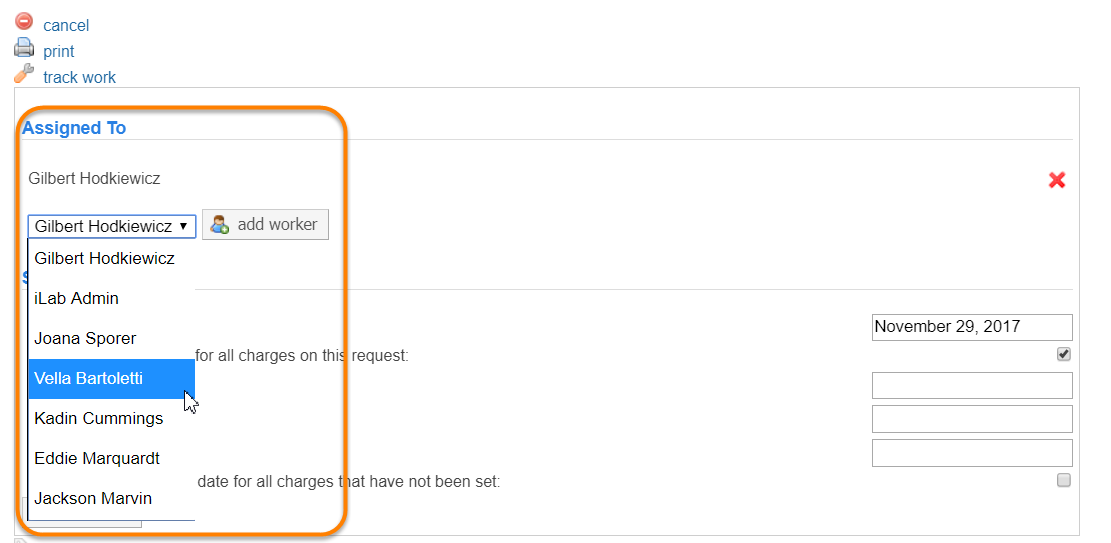
Core Administrators can delegate work by assigning a service request to core staff members. Click on the "track work" link ("spanner" icon). Under the "Assigned To" section, click on the down arrow to see a list of all core staff members listed in iLab (everyone who is added to the "Members" panel under the Administration tab). Click on the name of the staff you wish to assign to work on this request, and then click on the "add worker" button. The name you selected will now display right below the "Assigned To" header. You can remove an assigned worker by clicking on the red "X" to the right of their name.

The assigned worker can also be viewed by core staff and core customers on the View All Requests Tab.

Update Service Request Dates
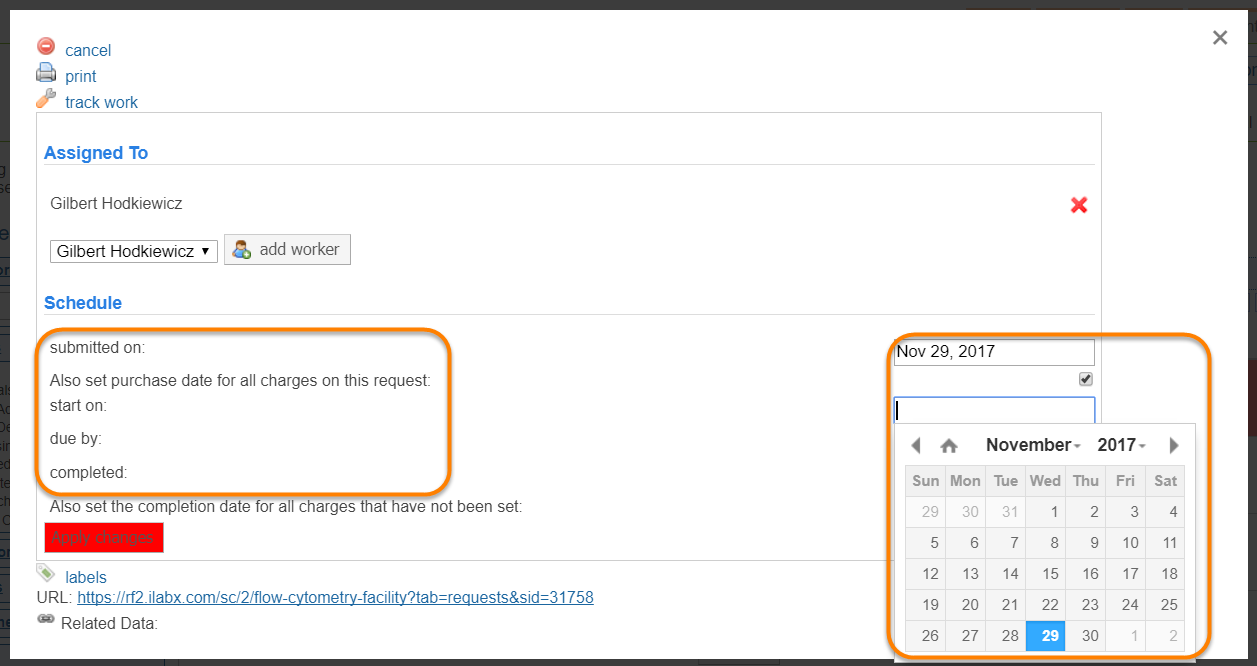
Core Administrators can update various dates associated with Service Requests and the underlying charges. Click on the "track work" link and refer to the "Schedule" panel:

- Submitted on: Change this date to update the date at which the request was updated. Note: Not all institutions allow this date to be changed.
- Also set purchase date for all charges on this request: Check this box to also set the "purchase date" for all charges that are part of this request to the "submitted on" date above.
- Start on: Set the date the core would like to start the work for this request (used for internal tracking by the core).
- Due by: Set the due date of the request (used for internal tracking by the core). Specifically, you can filter requests by this due date in the various filter interfaces.
- Completed: Manually set the completion date of the overall request. This date cannot be in the future.
- Also set the completion date for all charges that have not been set: Check this box to also set the completion date of all charges in this request to the completed date above.
Note that the "Apply changes" button is red when there are new changes that have not yet been saved. When you are finished adding dates, click on "Apply changes" to save.
Add Labels to a Service Request
Core staff may assign their own labels to a service request and filter for the labels in the various filter interfaces. To do so, click on the "labels" link. Then, enter single word labels in the text box, and click "Save".
To enter a multi-word label, simply surround your label with quotation marks. (In this case, we also entered "multi-word label".)
Your labels will be visible in the request details view (under Overview) and can be filtered for on the View All Requests Tab (see Filters).
Get Direct Request Link
The Edit Request interface provides you with a direct link to the request in the URL section, which you can copy and provide to the core or the customer:


