To create a new iLab account, you will need to fill out an Account Request form, either by:
- Using the sign-up link sent to you by the Core facility;
- Using one of the generic sign-up links, divided by iLab instances;
- Using your institutional credentials, if your Institute has ID integration (SSO) with iLab.
Unsure where to start? Use the iLab Login Tool NEW!
This article will cover:
Choosing an iLab Instance
Select the iLab instance based on the location of the institution or research facility from which you are ordering services.
iLab Site |
Location |
Link |
|---|---|---|
U.S. Instance |
All users ordering services from U.S.-based institutions or research facilities. |
|
DFCI Instance |
All users ordering services from a DFCI core facility, including those who already have an iLab account in the general iLab U.S. instance. |
|
Stanford Instance |
All users ordering services from a Stanford University core facility, including those who already have an iLab account in the general iLab U.S. instance. |
|
CA Instance |
All users ordering services from institutions or research facilities located in Canada. |
|
EU Instance |
All users ordering services from institutions or research facilities located in Europe or in the Middle East. |
|
AU Instance |
All users ordering services from institutions or research facilities located in Australia or within the Asia-Pacific region. |
Start
Once you open the 'Sign-Up Form', it will bring you to the first step of the Registration interface, where you enter your e-mail address, verify the reCAPTCHA requirement and agree to iLab's privacy and security policies.
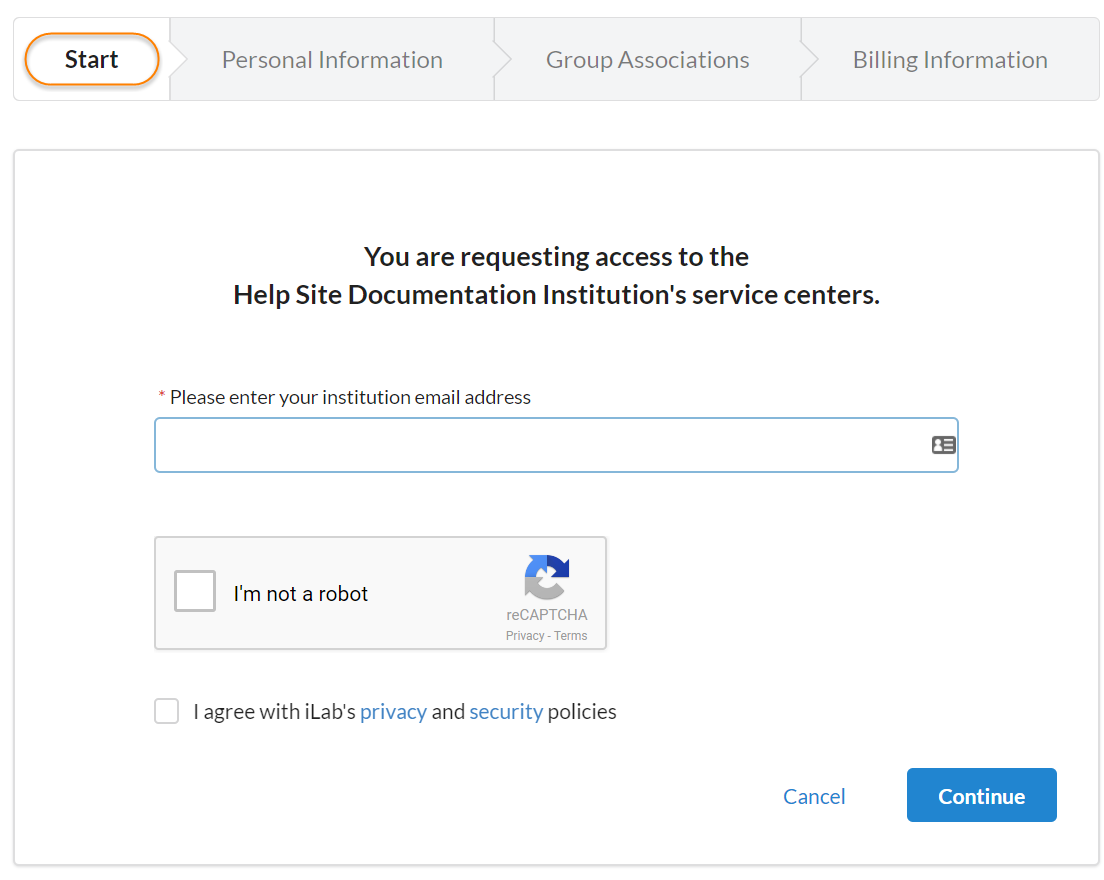

Your e-mail address will be reviewed, and if your institution has an ID Integration with iLab, the registration process will redirect you to your own institution's authentication system:
Once authenticated, you will choose the PI that you work with and your PI or your institution's administrator will be notified for approval. Once approved you will receive access to iLab and the site you wish to utilize.
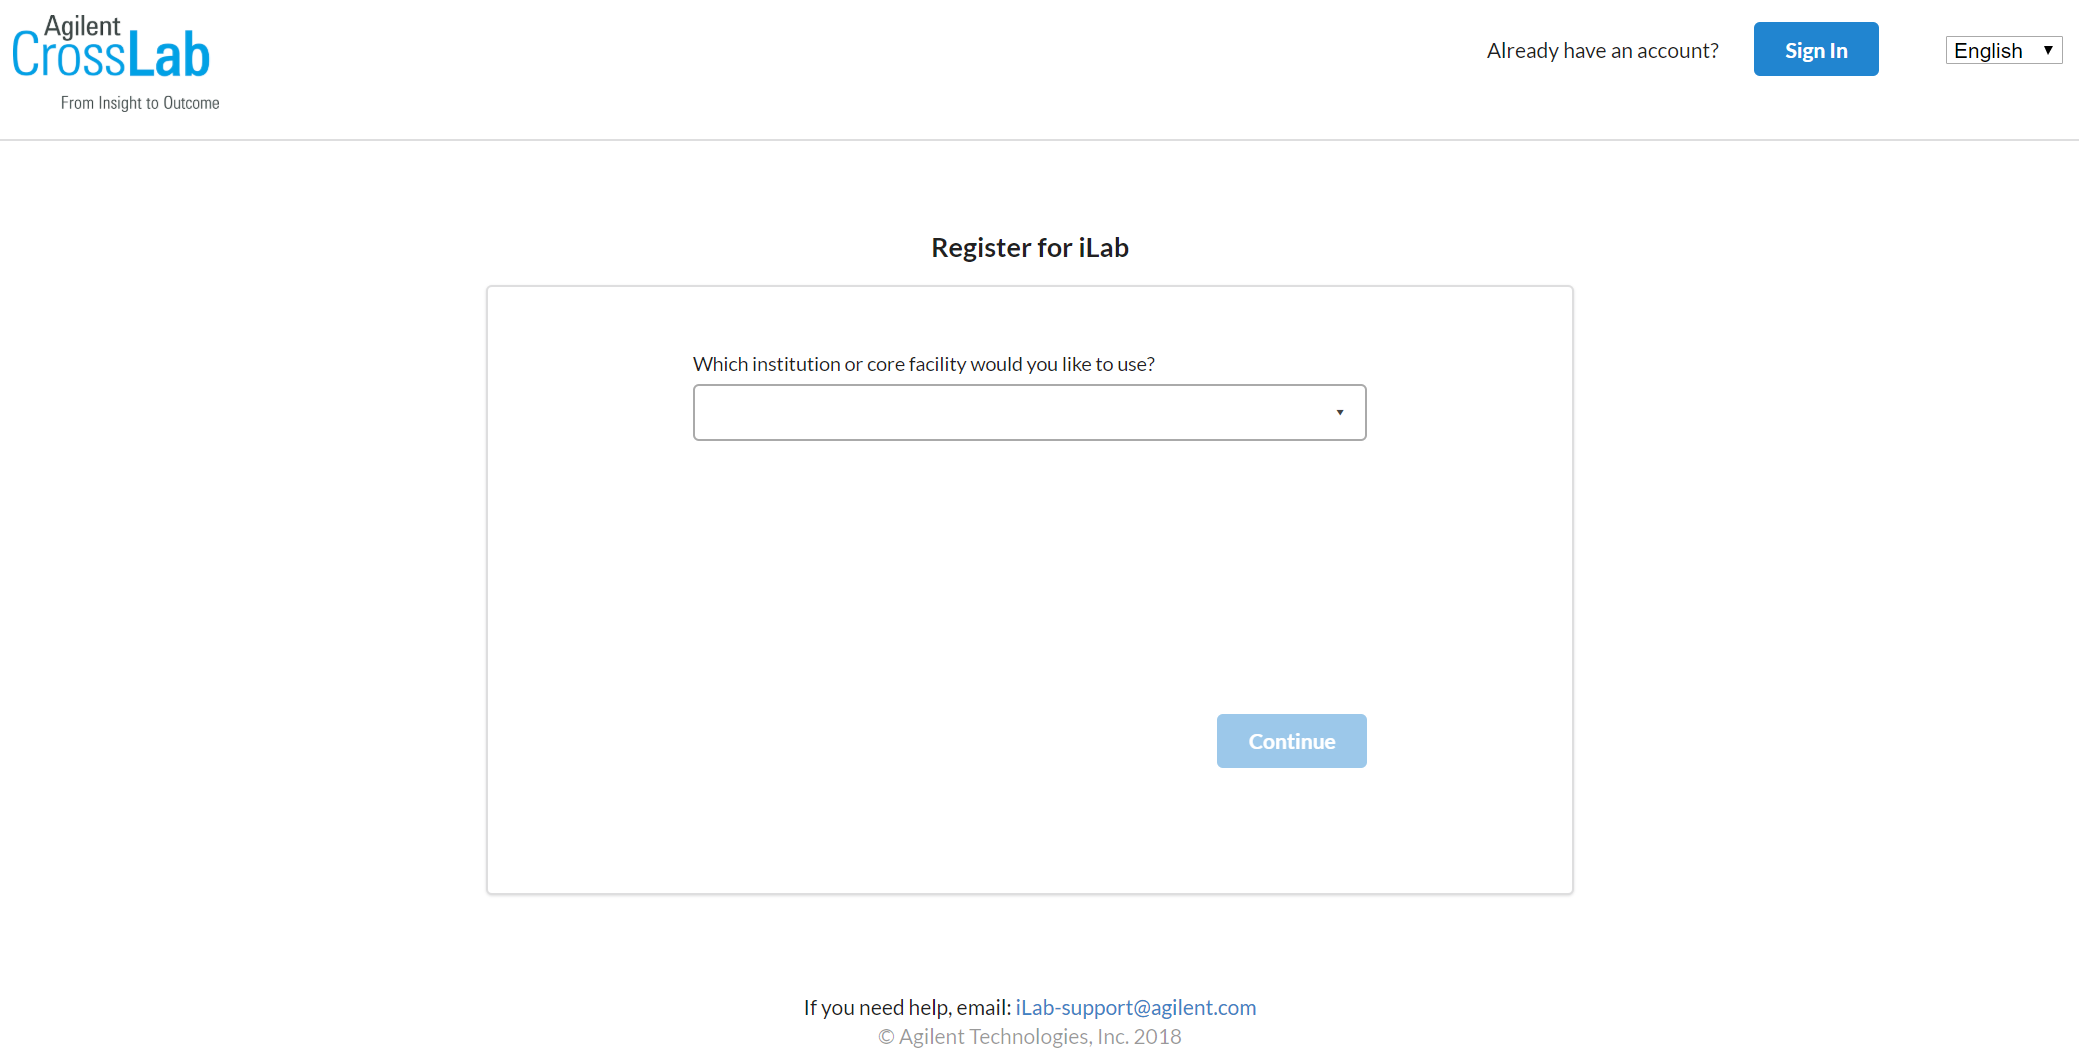
You will be asked to indicate the iLab institution that you are registering for and will then be directed to finish the registration starting with providing your email and moving through the steps of the registration wizard below.
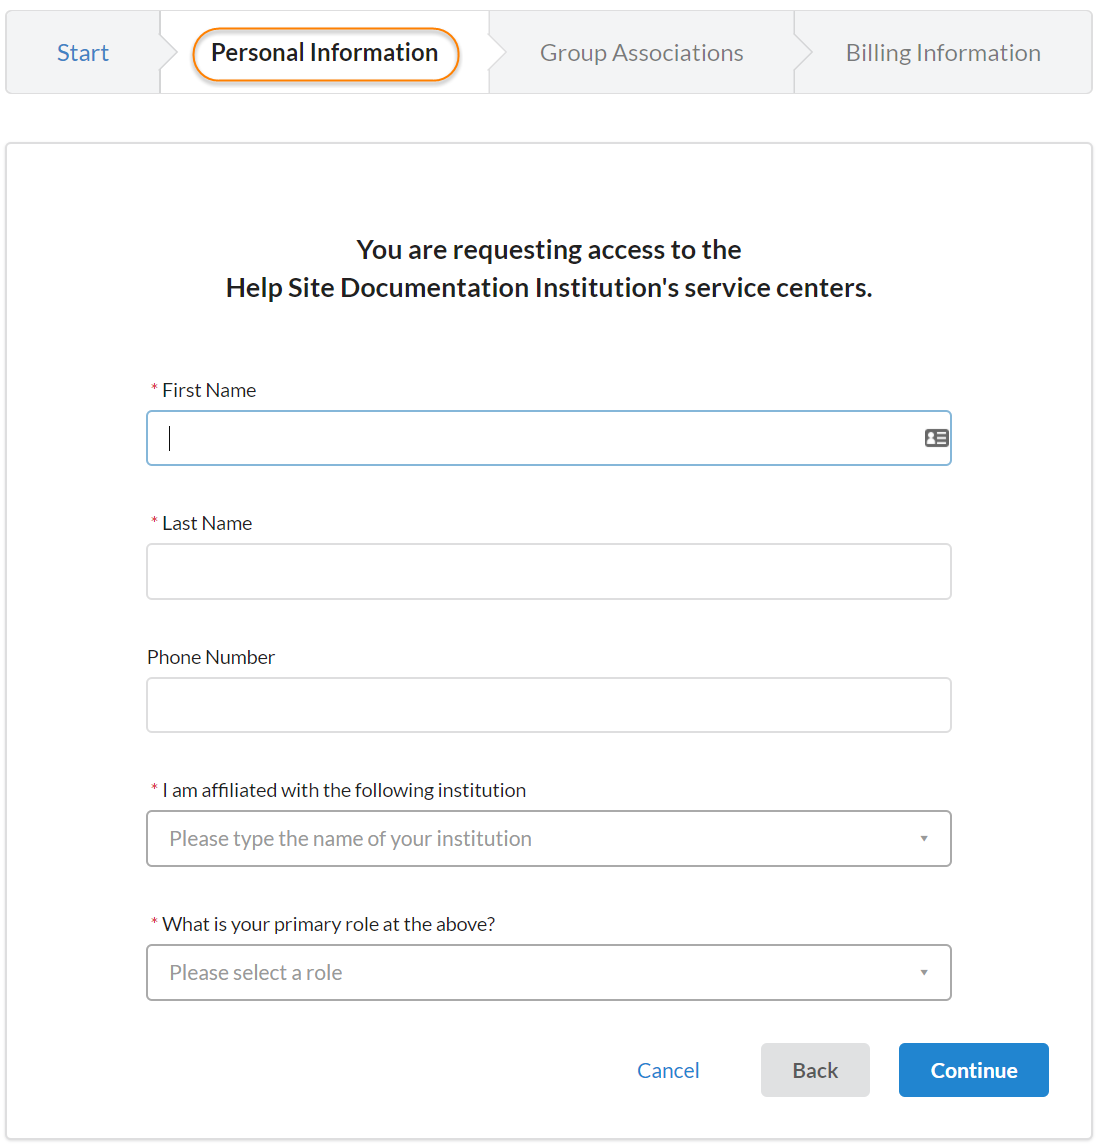
Personal Information
The second step of the process requires you to complete your personal information. The institution field may be pre-populated based on the e-mail address, but this selection can be overridden.
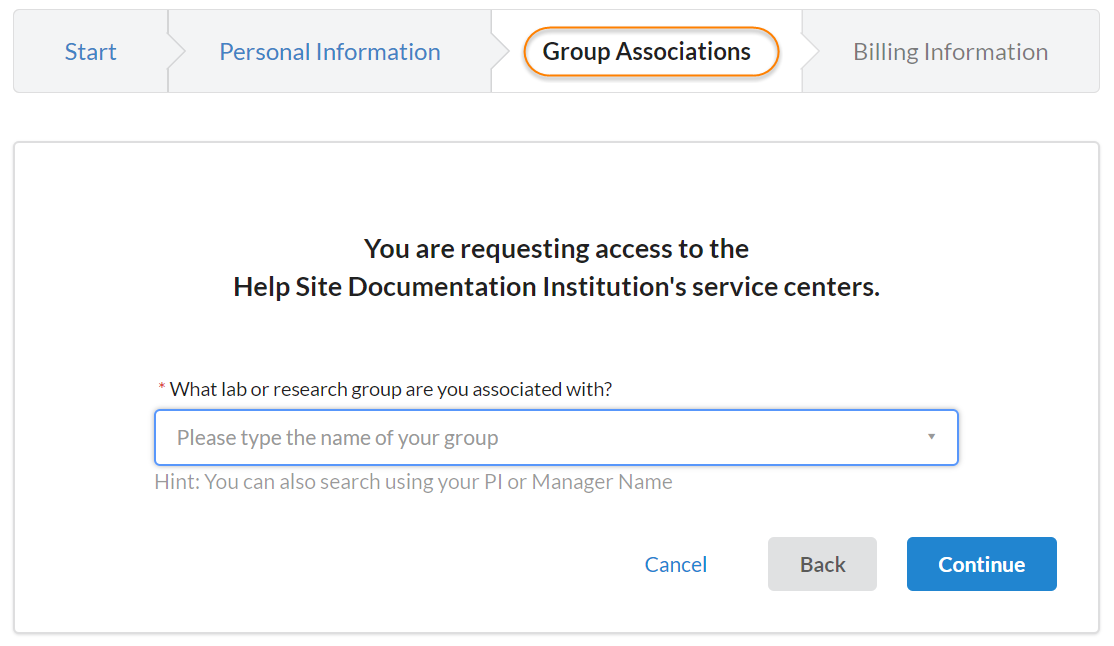
Group Associations
The third step prompts you to indicate the Lab/Group you are associated with. You may enter the group name, PI name, or financial approver and the system will search for a group matching that information. If there is no existing Lab/Group, you can use "Create New Group" to create a new Lab/Group.
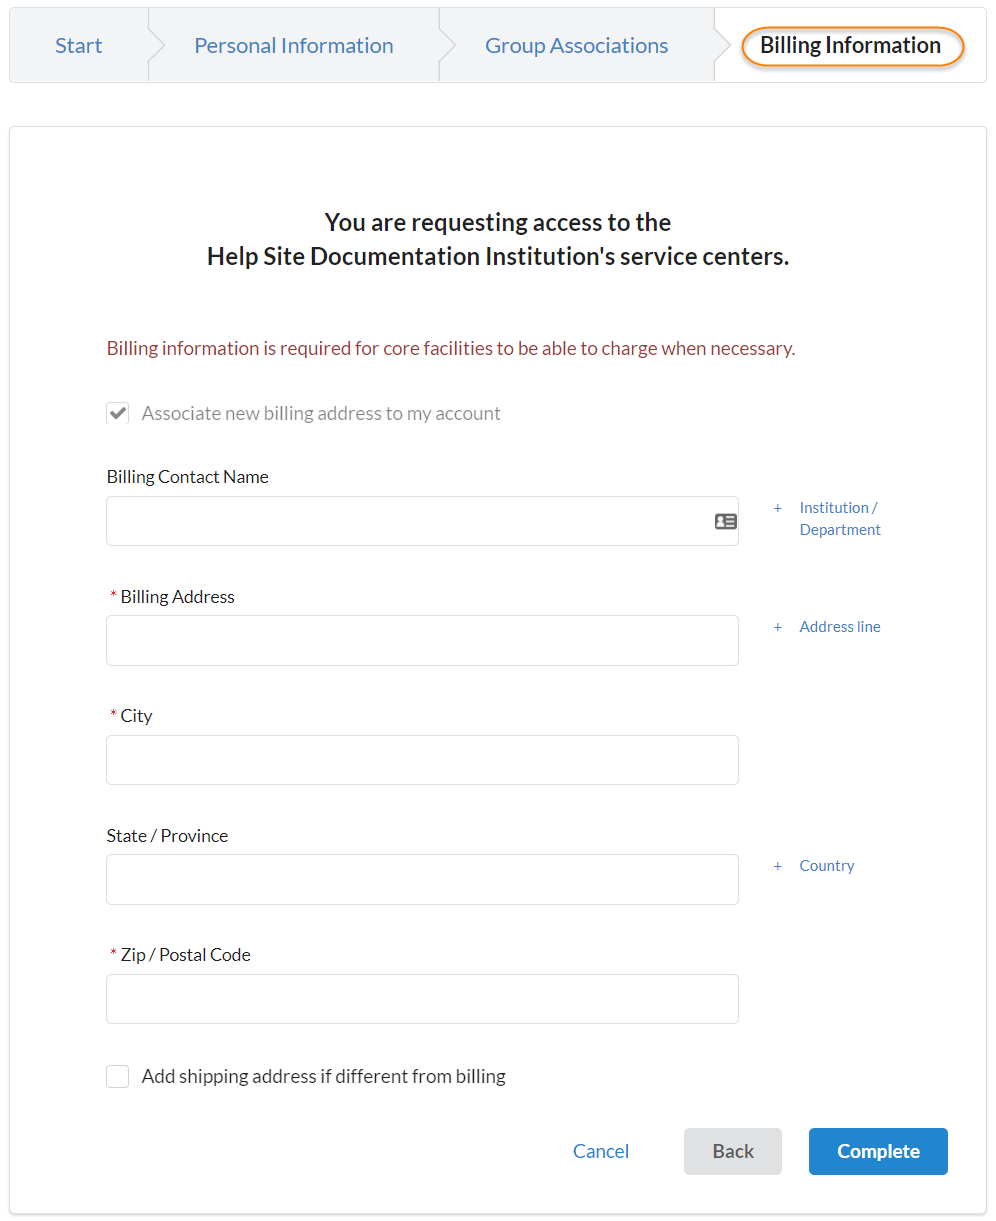
Billing Information
The fourth step may not be required for the institution you are registering with, in which case you would have been prompted to complete the process after the "Group Associations" step. However, if Billing Information is required, you will be prompted to complete the following information:
After the final step, your registration can be completed. If your registration meets the following conditions, it will be completed momentarily, you will receive a confirmation e-mail and the PI and Lab/Group managers will be notified:
- The institution you are registering with already exists in iLab
- The registration e-mail address matches a known institutional domain
- The Lab/Group you are registering with already exists in iLab
If these conditions are not met, your registration will be manually reviewed and account creation (or rejection) may take up to 24 hours.