For a period when a resource will not be available, you can create time blocks to prevent users from booking new reservations during that time.
Create an Unavailable Event
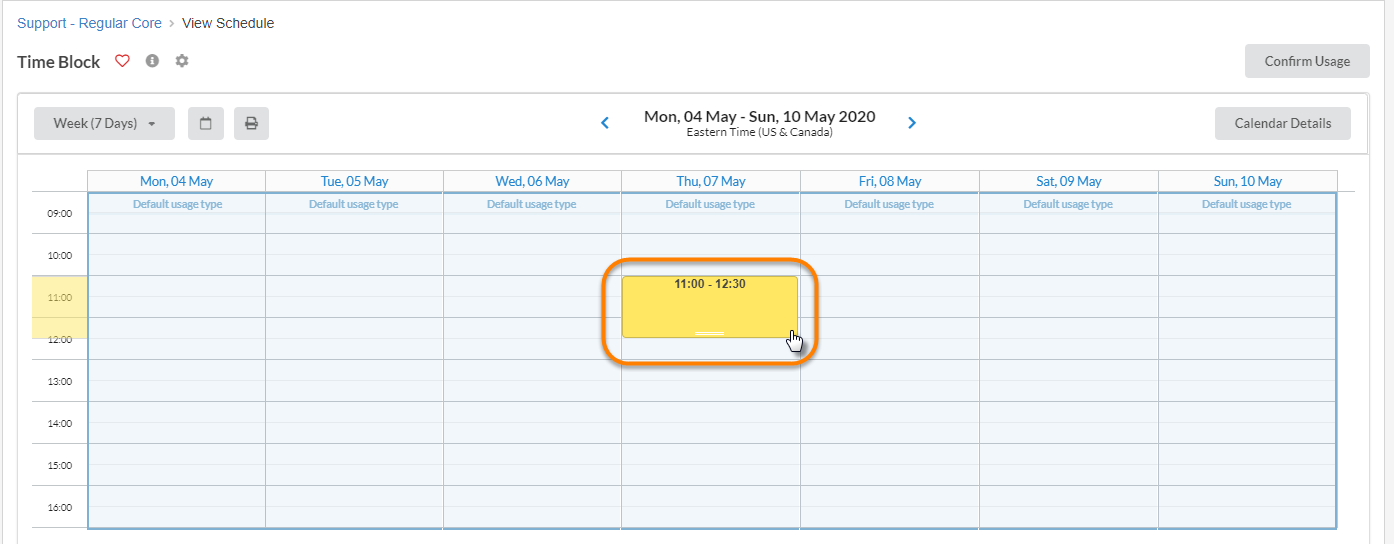
To create a time block, open the calendar page of the resource and click to drag the time period on the day of the intended unavailability. You can then adjust the exact date and time when choosing the event settings:
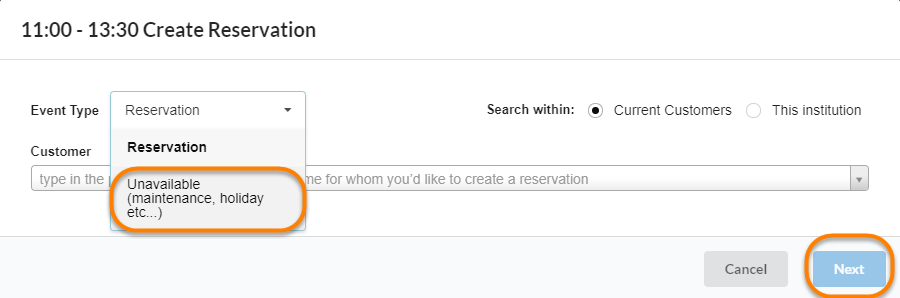
From the event type drop-down list, select ‘Unavailable (maintenance, holiday, etc.)’, and press 'Next':
Unavailable Event Settings
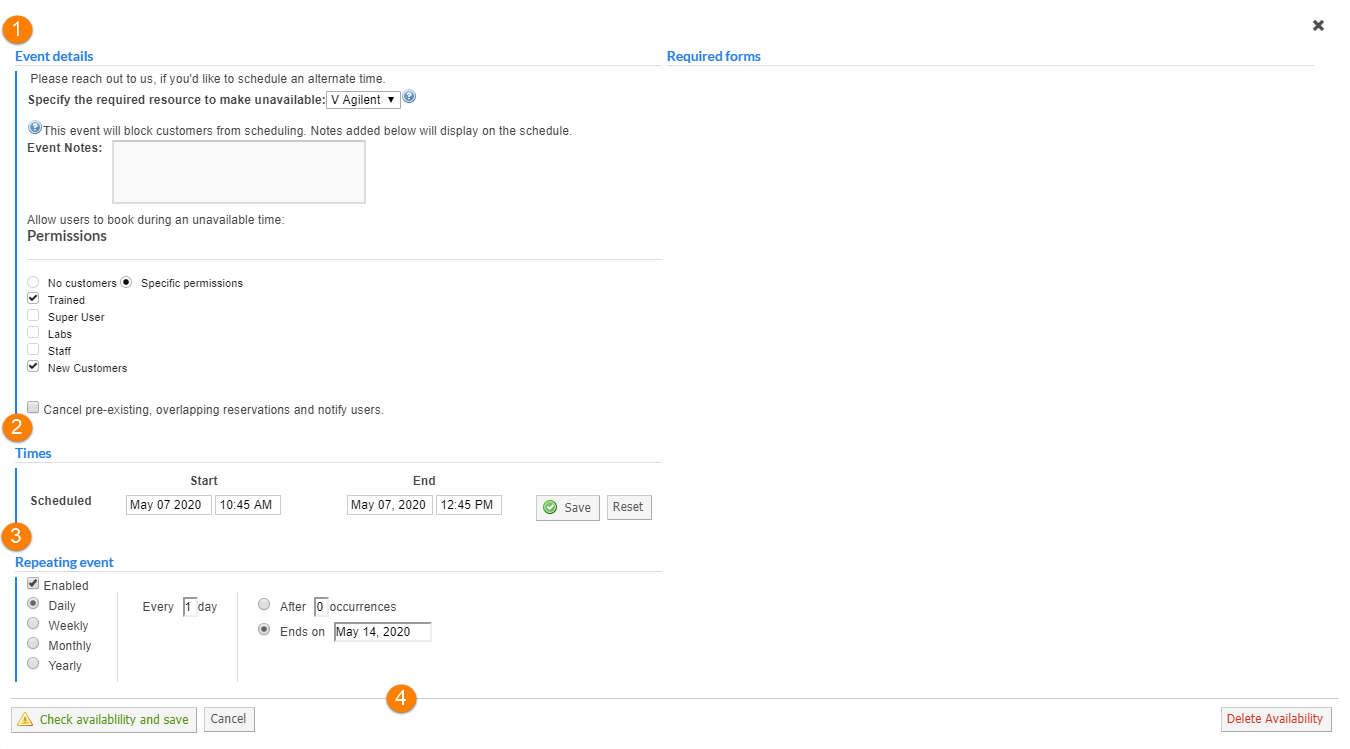
- Event Details: Add ‘Event Notes’ to be displayed on the calendar view (e.g., reasons for the unavailability, inquiries or other relevant information) and choose if any specific group can have access to the equipment during the unavailability. You can also cancel any pre-existing, overlapping reservations and notify users about the cancelation.
- Times: Confirm the date and time. To modify, click on the ‘edit pencil’ icon, update the information, and then click on the 'green checkmark' icon.
- Repeating Event: Check the 'Enabled' box, if applicable, and adjust the various recurrence settings as you need (such as every other day, a specific date every month or yearly).
- Confirmation: Press 'Save' to confirm (If you are creating a recurrent time block, you will see 'Check Availability and Save'), 'Cancel' or 'Delete Availability' if the event is no longer relevant.
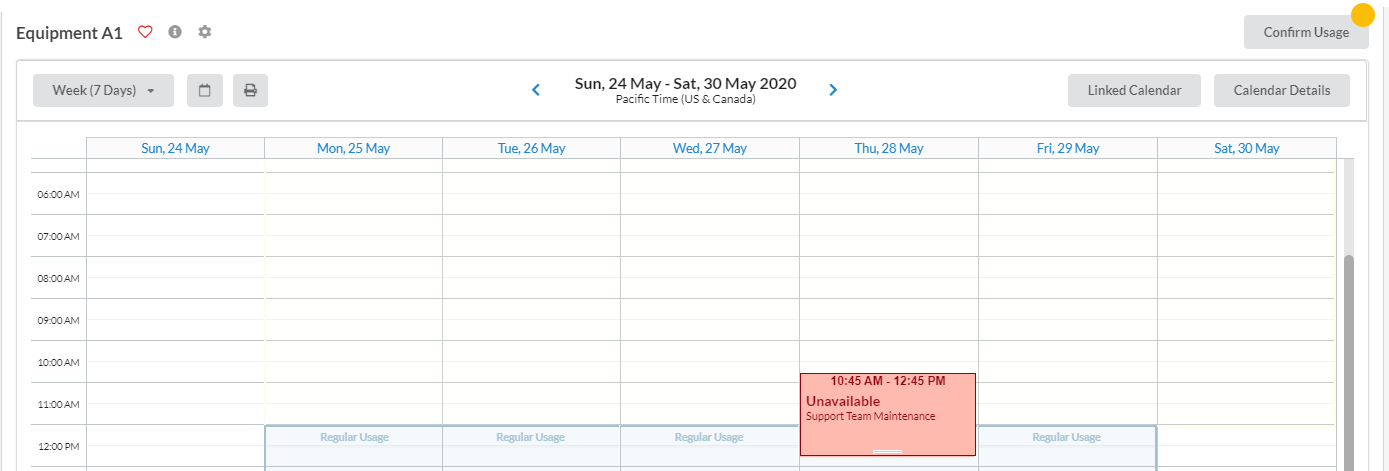
This is how the calendar displays an unavailable time block: