Editing Service Request Templates
Role: Core Administrator
The Service Requests panel is located on the Request Services tab. As a core administrator, you can configure this panel to showcase the Service Request Projects you offer.
- Edit general project instructions
- Create a project template
- Edit a project template
- Delete a project template
- Change the order of templates
Edit General Project Instructions
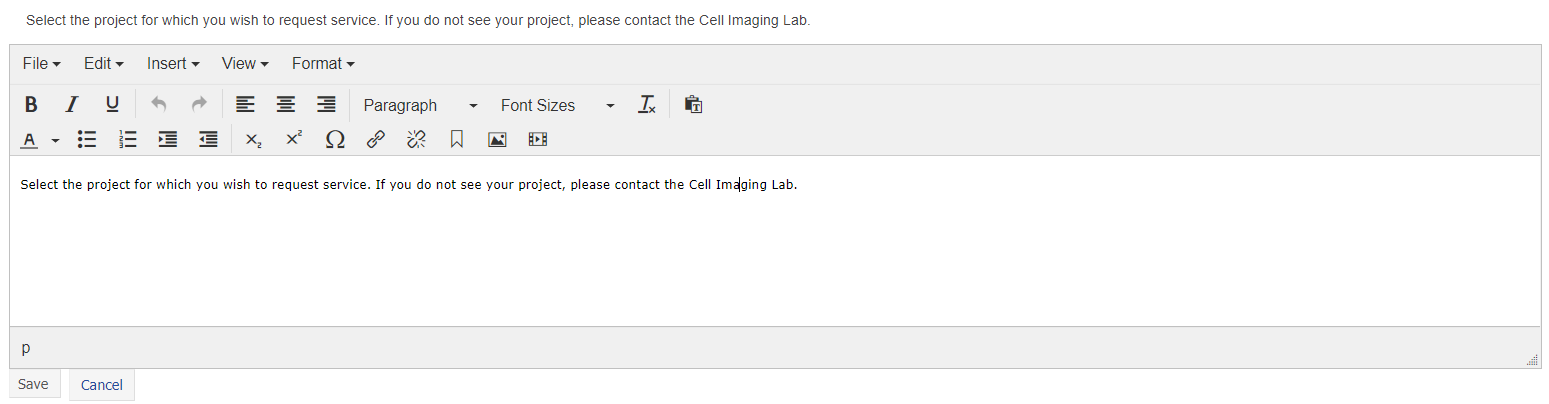
The general project description section offers space for a brief description of your the service projects section and displays at the top of the Service Projects & Quote Requests page.

To edit, click on the pencil icon to the right to open the text editor and enter a new description. Click 'Save' to exit this screen and see the information you have entered.

Create a Project Template
To create a template, click on the 'Add a Service Project Template' button.

This will open a new Project Template:
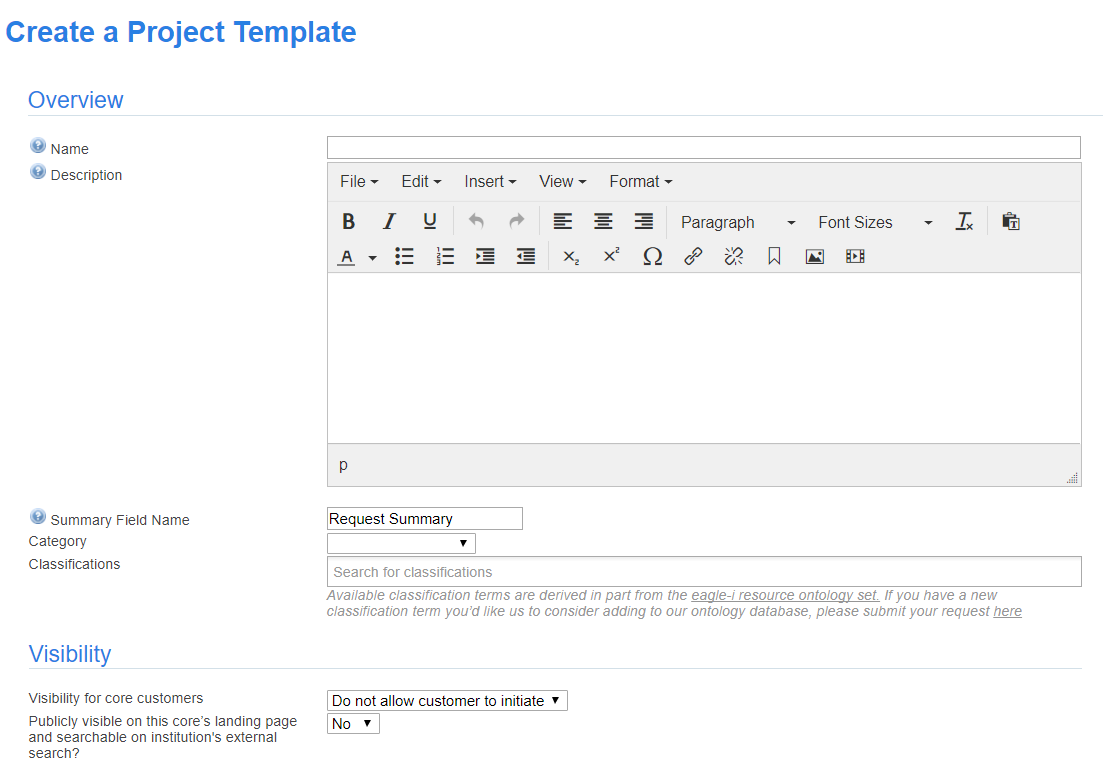
- Name: Enter a name for your template. It should be something easily recognizable.
- Description: The Description should contain a high level overview of the project as a whole.
- Summary Field Name: If you would like to change the name of the description field to something else, such as project goals, enter the preferred name here. Note: This field is often used when time entry is enabled.
-
Category: Service projects can
be grouped into categories. To create a new category click
in the Category drop down and select
Add new category, at the bottom of the list. Once
selected a text field will appear to the right where you
can type in the name of the new category you need to
create.

- Classifications: Available classification terms are derived in part from the eagle-i resource ontology set. If you have a new classification term you’d like us to consider adding to our ontology database, please submit your request here.
- Visibility for core customers: Indicate whether customers should be able to initiate requests (Do or Do Not Allow).
- Publicly visible on this core's landing page?: Indicate whether this project should be visible to customers on the external landing page when not logged into iLab.
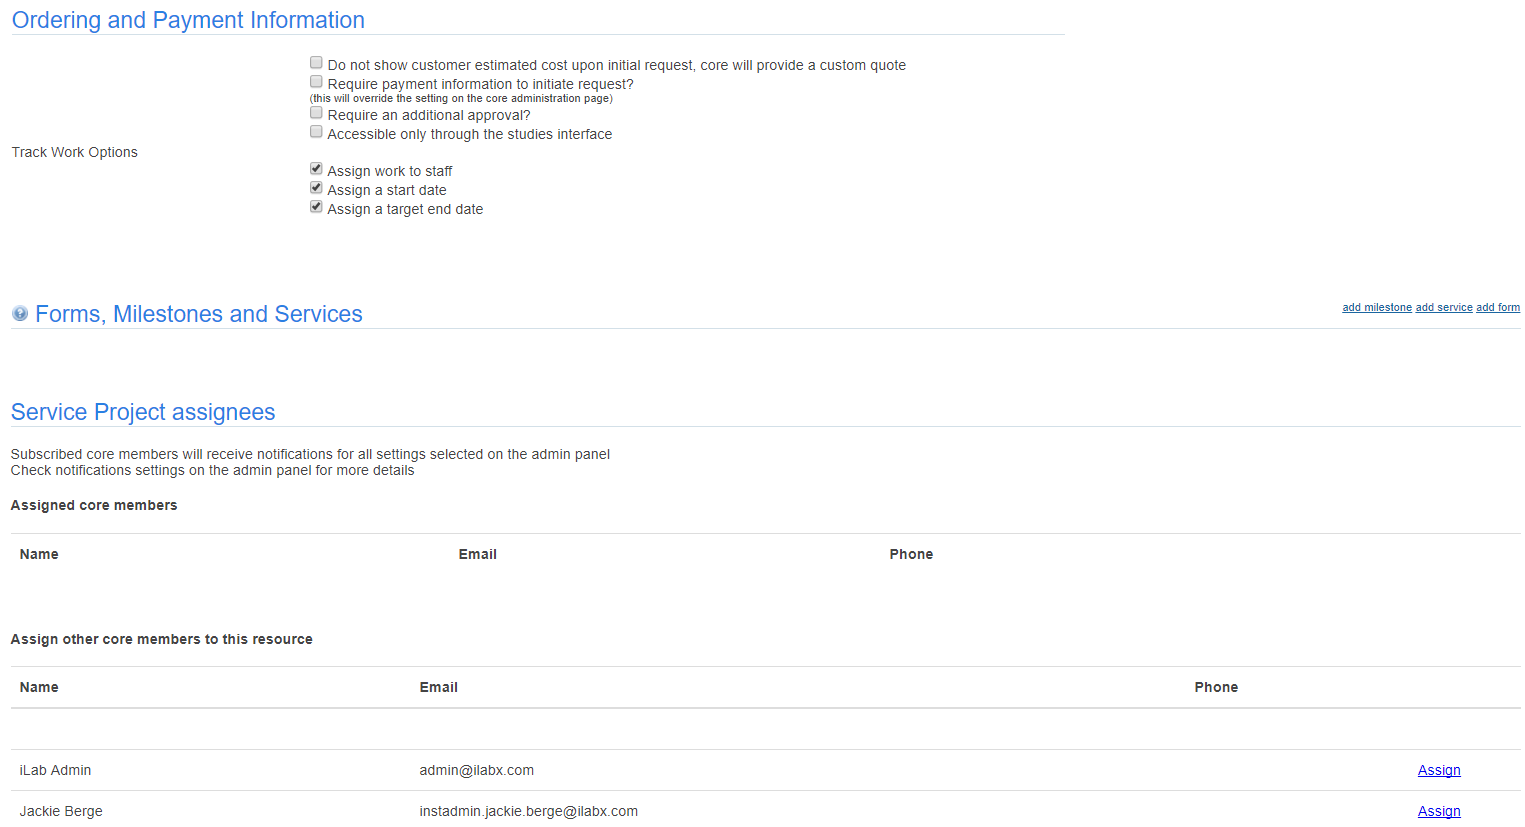
- Do not show customer estimated cost upon initial request, core will provide a custom quote: When a customer submits a request, you may choose to display an estimated cost (by adding default services to the template), or you may choose to provide a custom quote after the request is submitted.
- Require payment information to initiate request?: Indicate whether you will require payment information when the request is submitted. This will override the core settings on the administration tab.
- Accessible only through the studies interface: For cores using the studies module, indicate if this project should be accessed within the study only or may be requested separately.
- Assign work to staff: Within each request, core staff can determine what project management tools they want available. Check this box if you would like to enable the ability to assign this request to a certain core staff member.
- Assign a start date: Within each request, core staff can determine what project management tools they want available. Check this box if you would like to be able to assign a start date to this request.
- Assign a target end date: Within each request, core staff can determine what project management tools they want available. Check this box if you would like to be able to assign an end date to this request.
-
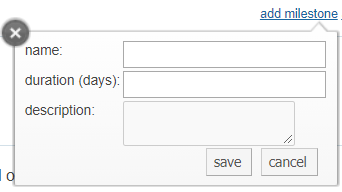
add milestone: A milestone is an
important event that marks a stage of development within
the project. Use the 'add milestone' link to add a
standard milestone to this request.
-
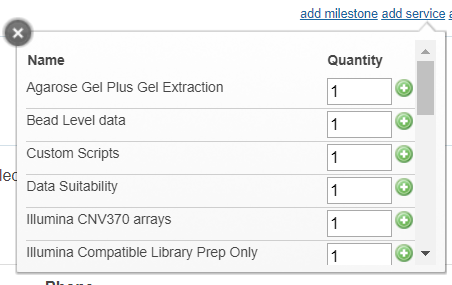
add service: If you have a fee you want
added by default to every submitted request, you can add
the service by using the 'add service' link on the far
right side of the template.
The list of possible services is generated from
the Add a Service List process.
-
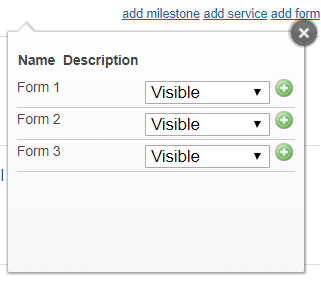
add form: The 'add form' link allows
staff to add already built forms from their form library
to a project template. Indicate whether this form will be
visible to all users, or core members only. For more
information, see
Custom Forms.
-
Assign: Select which core staff members
should be assigned to receive updates about the
request.
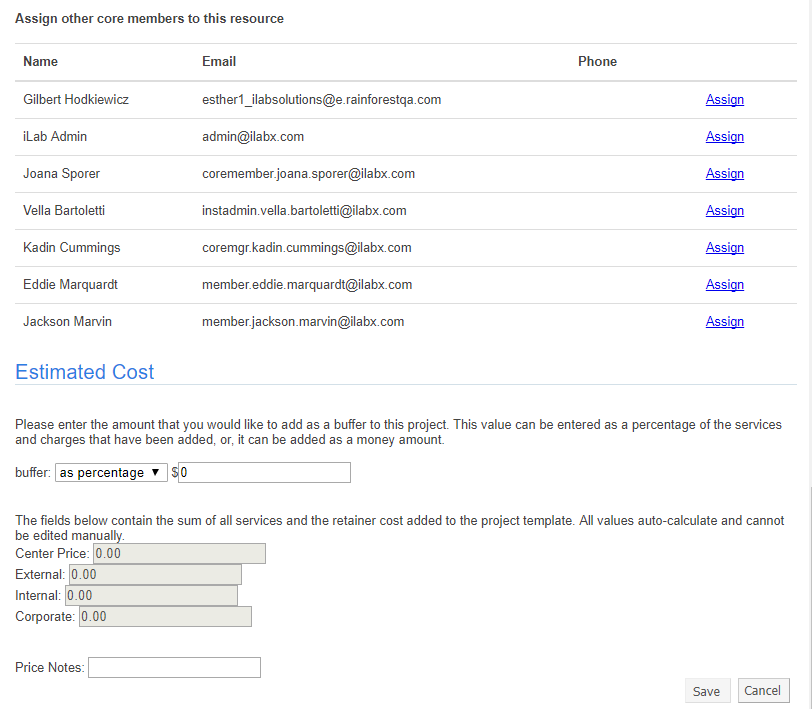
- buffer: Provide a buffer amount if you think the actual total of the project may exceed the initial estimated cost. This will eliminate the need for additional customer approval if the total project cost exceeds the initial cost of the project. This can be a percentage of the request total, or a dollar value. This is not a required field
- price groups: Charge per price class will populate here if default charges have been added to the project template. Note: Institutions can define the name of price groups and may differ from the example.
- Price Notes: Enter any notes you wish for the user to see when they examine the estimated cost of their project.
When you have completed all fields, click 'Save' to save the template. This project template will now display and be available for selection by your users.
Edit a Project Template
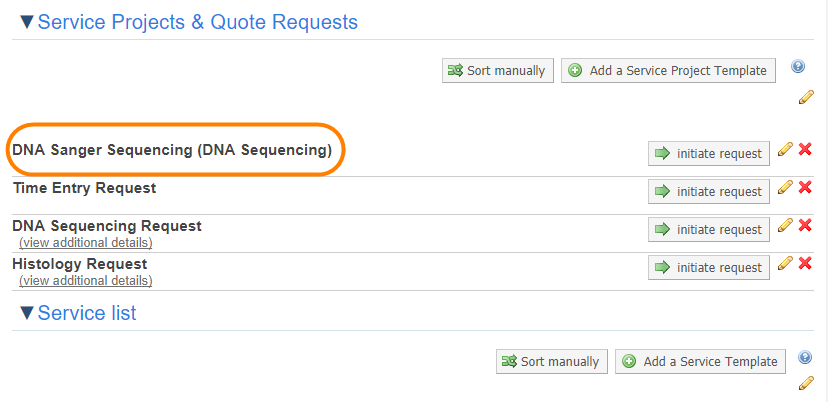
To edit a template, click on the pencil icon beside the template you would like to edit:

This will open up the Edit a Project Template interface, which is identical to the interface discussed in the Creating a Project Template section.
Delete a Project Template
To delete an existing project template, click on the red x beside the template you would like to delete.

A confirmation window will display. Click OK to clear the message and delete the template. Note: This process is not reversible, please be sure you really want to delete the project before clicking OK.
Change Order of Templates
You may change the order of the templates display by clicking the "sort manually" button.

Then, hover over the green arrows until the cross-hairs display. Next, click and hold down the mouse while you move the template up or down.

When you are finished, click the "Finish Sorting" button in the top right hand corner.