File Upload
Role: Core Administrator
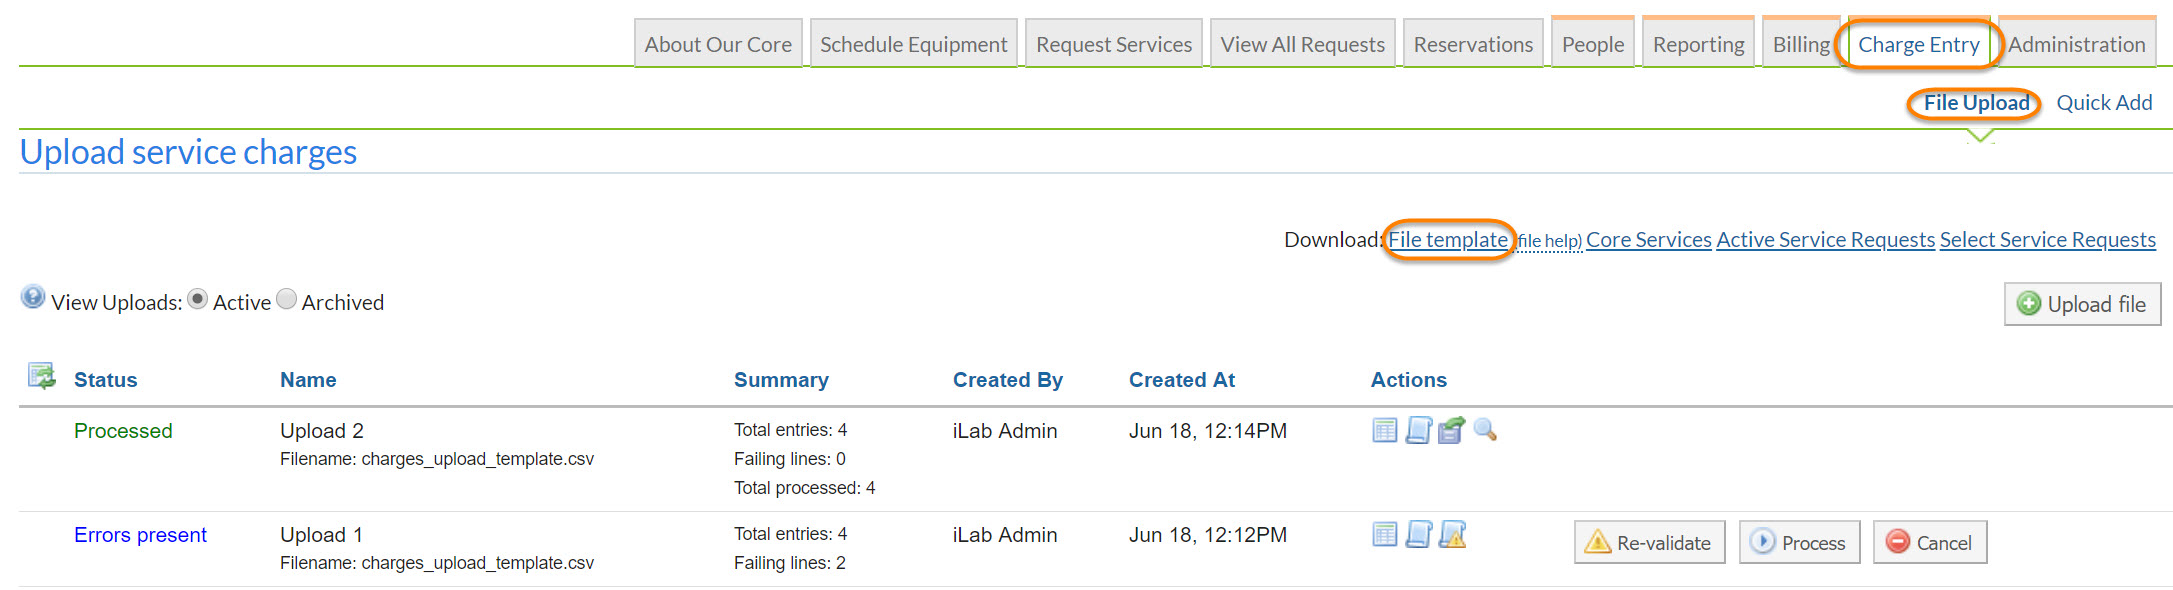
File upload provides a way to bulk upload charges into the system, using the Charge Entry interface. To upload charges, click on the Charge Entry tab on your core's page, then click on "File Upload". Note: The Charge Entry feature must be turned on for your core by iLab.
Prepare a File
First you will need to download the file template by clicking on the "File template" link.
An example of the template is displayed below.

iLab can only accept the fields within the template when uploading charges. It is best practice to download a new template each time you want to upload files or generate a new file with the required columns. Spreadsheets with deleted data or multiple sheets may cause validation errors.
To upload service charges there are a few required fields:
-
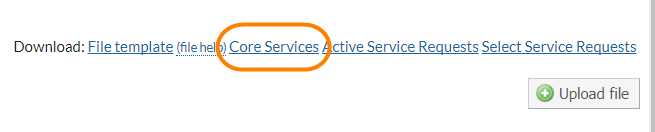
service_id: You will need to indicate the
specific service item you are uploading by mapping the
charge to a unique iLab service ID. You can download the
list of service ids on the File Upload page by clicking on
the "Core Services" link.
- service_quantity: You will need to enter the quantity of units of the service that was rendered.
Additionally, there are conditional fields you will have to complete depending on the information you provide.
-
service_request_id: If you want to add
the service charge(s) to an existing service request in
iLab, that is in the status of 'processing', you must
provide the Service Request ID.
-
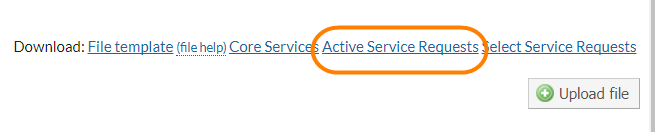
You can download a file of all processing requests by
clicking on the "Active Service Requests" link.
-
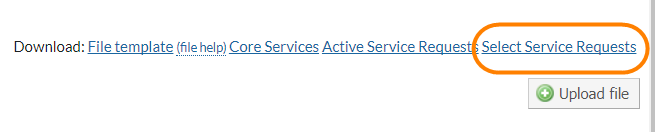
Alternatively, you can search for the desired requests
on the
View All Requests
tab and download the csv containing the service ids
from there. Click on the "Select Service Requests"
link to navigate to the
View All Requests
tab:
-
You can download a file of all processing requests by
clicking on the "Active Service Requests" link.
-
owner_email: If you do not want to add
charges to an existing request and instead want to create
a new request, you will have to provide the request
owner’s email address.
- Note that the request owner must have an iLab account and you will need to know their email address in iLab to generate a new charge in their name.
-
pi_email: If the request owner you are
adding the charge for works for multiple different
Principal Investigators you will need to indicate which PI
the charge is for by adding their valid email address.
- Again, the email address you provide needs to be the email they have in iLab.
Other optional fields include:
- note: You can include a note when uploading charges. This note can prepend, append, or replace the service charge name once the charge is added to iLab.
- price: If your institution policies allow you to update pricing for uploaded charges you will see a price column. This feature is helpful for those groups that may have to update prices due to variables like market pricing.
- payment_number: If your institution policies allow for you to upload charges with valid fund or payment numbers you can include a payment number. If the payment number is not valid it will trigger an error during the file validation step.
- purchased_on: You can also indicate the date the service was rendered. If no date is entered, then the date of the upload will be the designated purchase date in iLab.
Upload a File
Once you have completed your charge upload file, you may upload the file into iLab by clicking on the "Upload file" button.
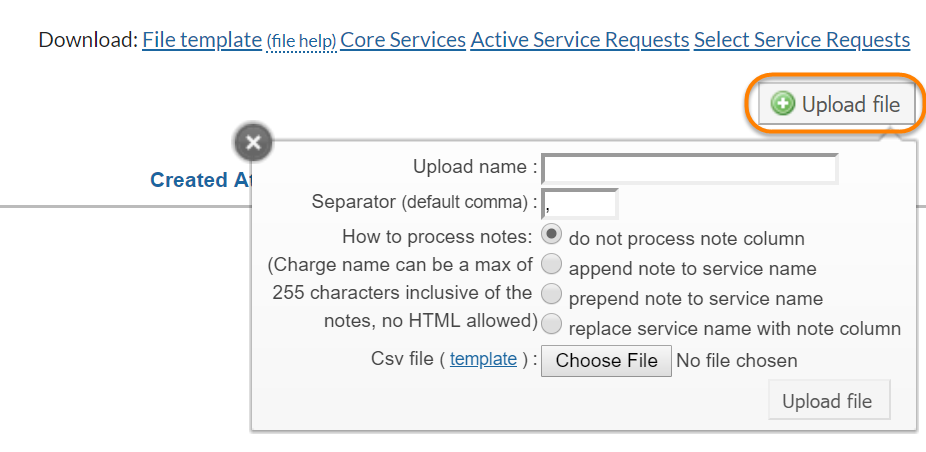
Once you click on "Upload file" you will need to choose how you want the file processed.
- Upload name: Enter in a name for the upload that will make it easier for you to find the upload again in the future.
- Separator: Enter in the delimiter that your file uses as the separator. Comma is the default delimiter.
- How to process notes: Text added to the notes field can be either not processed, be added to the front of the service name, the end of the service name, or replace the service name. Note that the total text area can be a maximum of 255 characters.
- Csv file: Attach the filled in upload template in csv format.
Now, click "Upload file" in the lower-right.
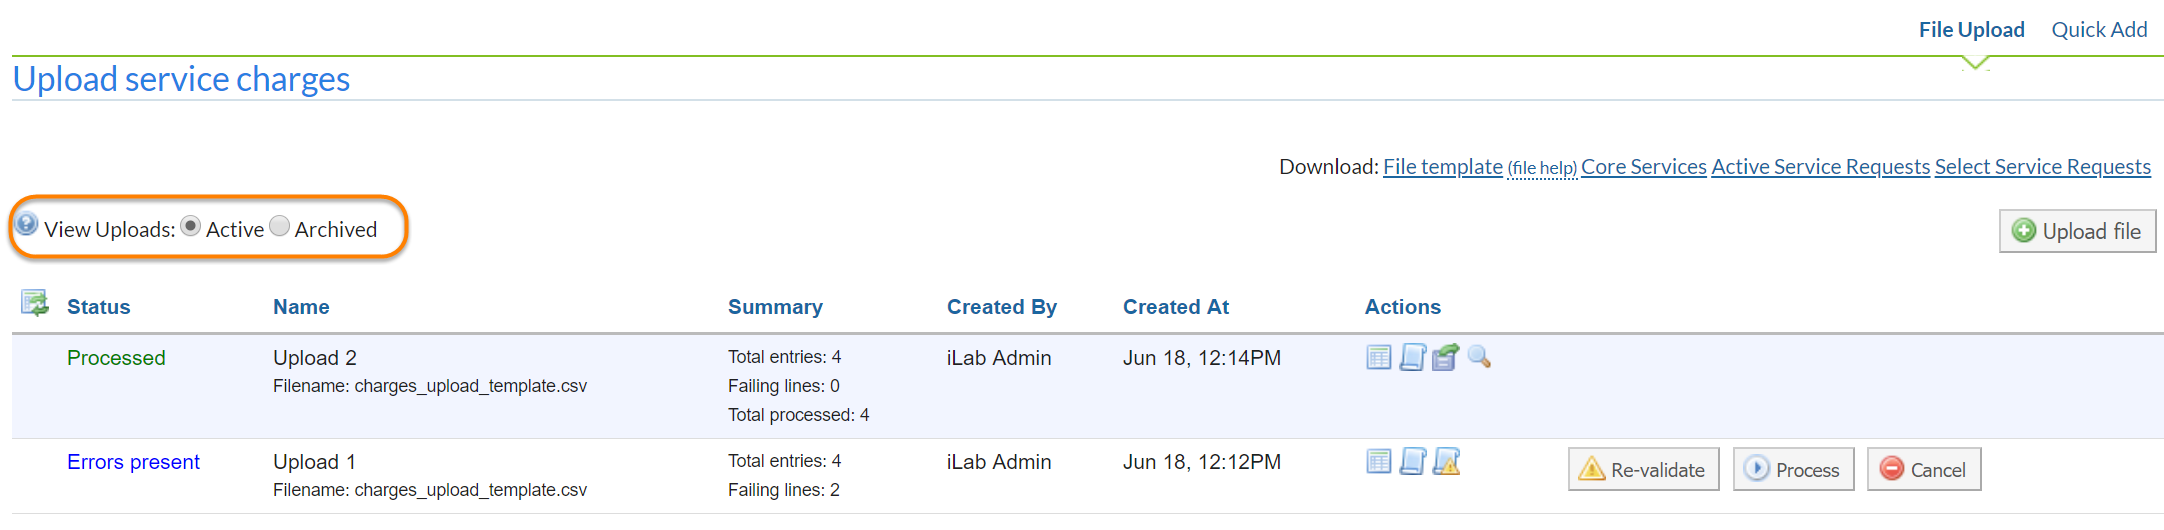
The new upload will display on the list below. Click on "Validate" to check the file for errors:

The file will be added to the queue to be validated. The
status of the validation will update every ten seconds. You
can also click on the refresh button () to refresh the status. This should not take very long
in most cases but if several files are being processed at
one time or if you are trying to process a large number of
charges this can take several minutes.
Once the validation is completed you will either see that
the file is valid or that there were errors present. When
errors are present you can download the error file () to see what caused the issue. The file will not process
if there are any errors present.
Fix Errors
If the file has error after completing validation, the status will read Errors present. You now have several options to investigate the errors and fix them:

-
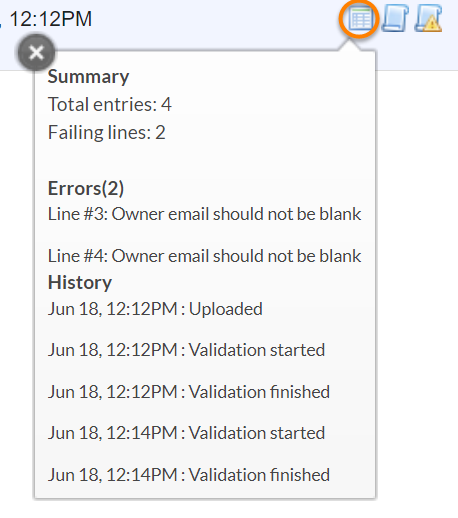
Show details: see detail of the upload,
including the specific error that were encountered:
- Download original: Download a copy of the original file.
- Download explained: Download a copy of the file, with entries that indicate specific errors
- Re-validate: Attempt to revalidate the (same) file. Note that you cannot change the uploaded file for an existing upload, but certain errors may be fixed by adding certain users to the system, creating missing service requests, etc. Once those fixes have been made in the system, use revalidate to check the file again.
- Process: This will finalize the upload (i.e. create charges) for only the valid lines in the file. Lines with invalid charges are skipped.
- Cancel: Cancel this upload
Typically, fixing an upload entails creating an updated file with the errors addressed, canceling the current upload and then uploading the fixed file as a new upload.
Finalize the Upload
If the file has no error after completing validation, the status will read File valid.

The "Process" action will be available. Clicking this will queue the file for finalization, which means that the charges will be created in the system.

Once the file has been successfully processed, the status will change to Processed, the charges will have been generated and several action are now available for this upload:
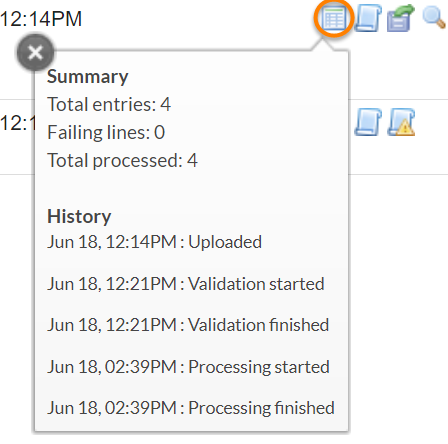
-
Show details: See a summary of the upload
and its history:
- Download original: Download a copy of the original file.
-
Archive: Move this file upload to the
archive, so it will no longer show on the current list of
upload. You can switch between the current upload and
archived uploads using the View Uploads toggle:
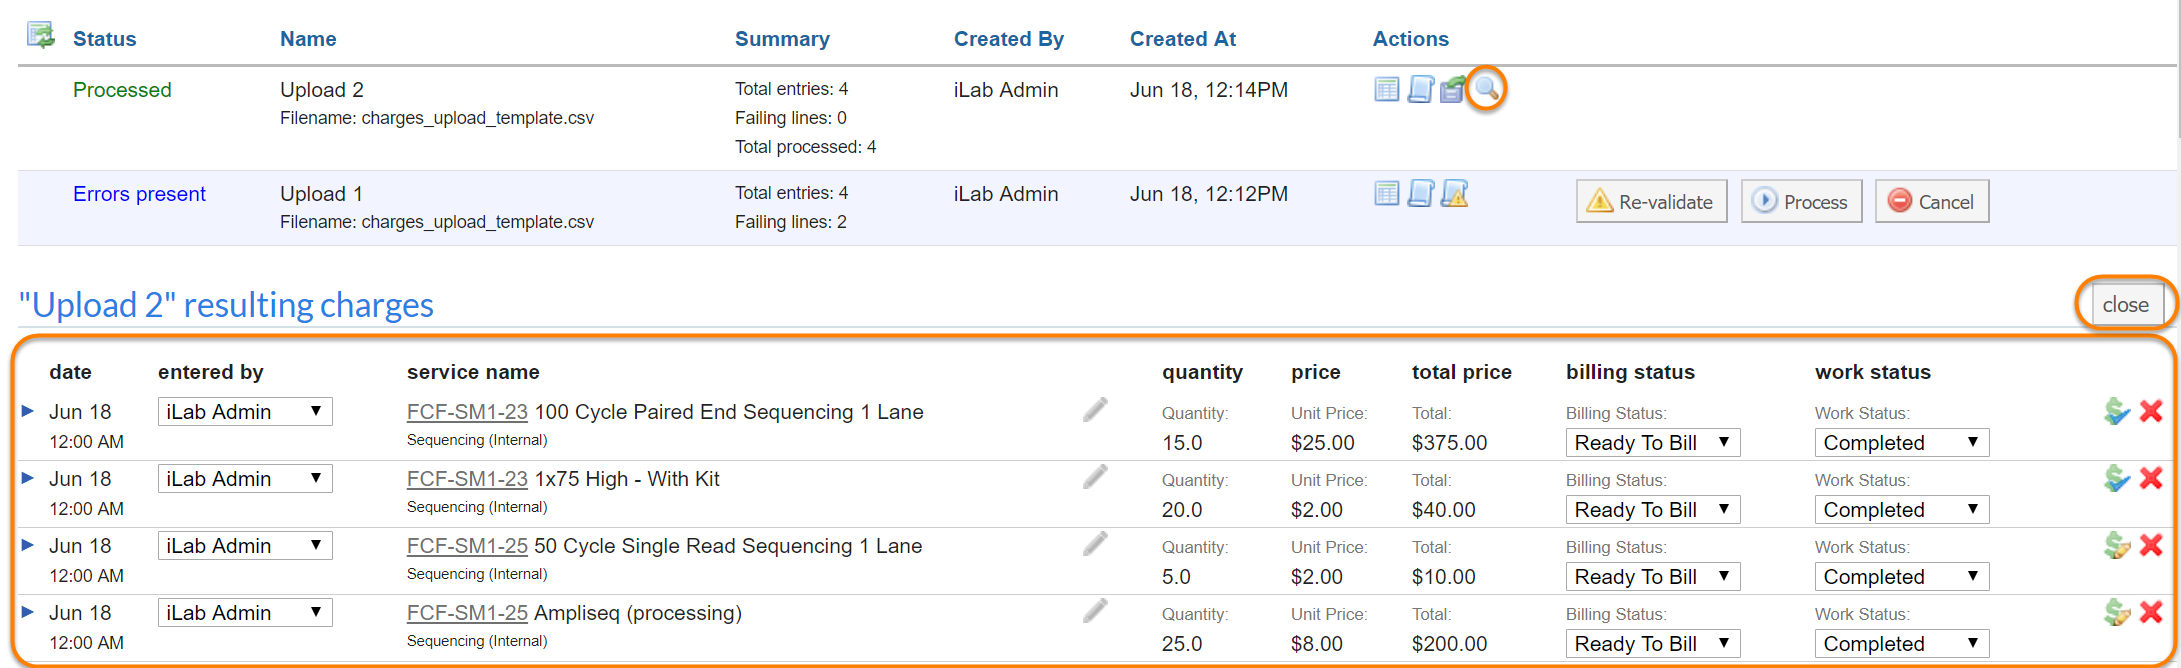
-
Show results: List all charges that were
successfully uploaded. A panel will show below the current
uploads that lets you directly make modification to the
uploaded charges, including the user who entered the
charges, service notes, billing status, work status and
billing information. For more information, see
View All Requests Overview (the functionality directly mirrors that of the
Request Detail panel).