Creating a billing event will automatically generate new invoices. Using the invoices link on the Billing Tab, you can view, download, manage and bulk send invoices. You have several actions available when preparing to send out invoices.
Layout of Invoices Tab
The invoices tab can be found by entering a single billing event on the Billing Tab. The invoices tab is broken into two main sections.
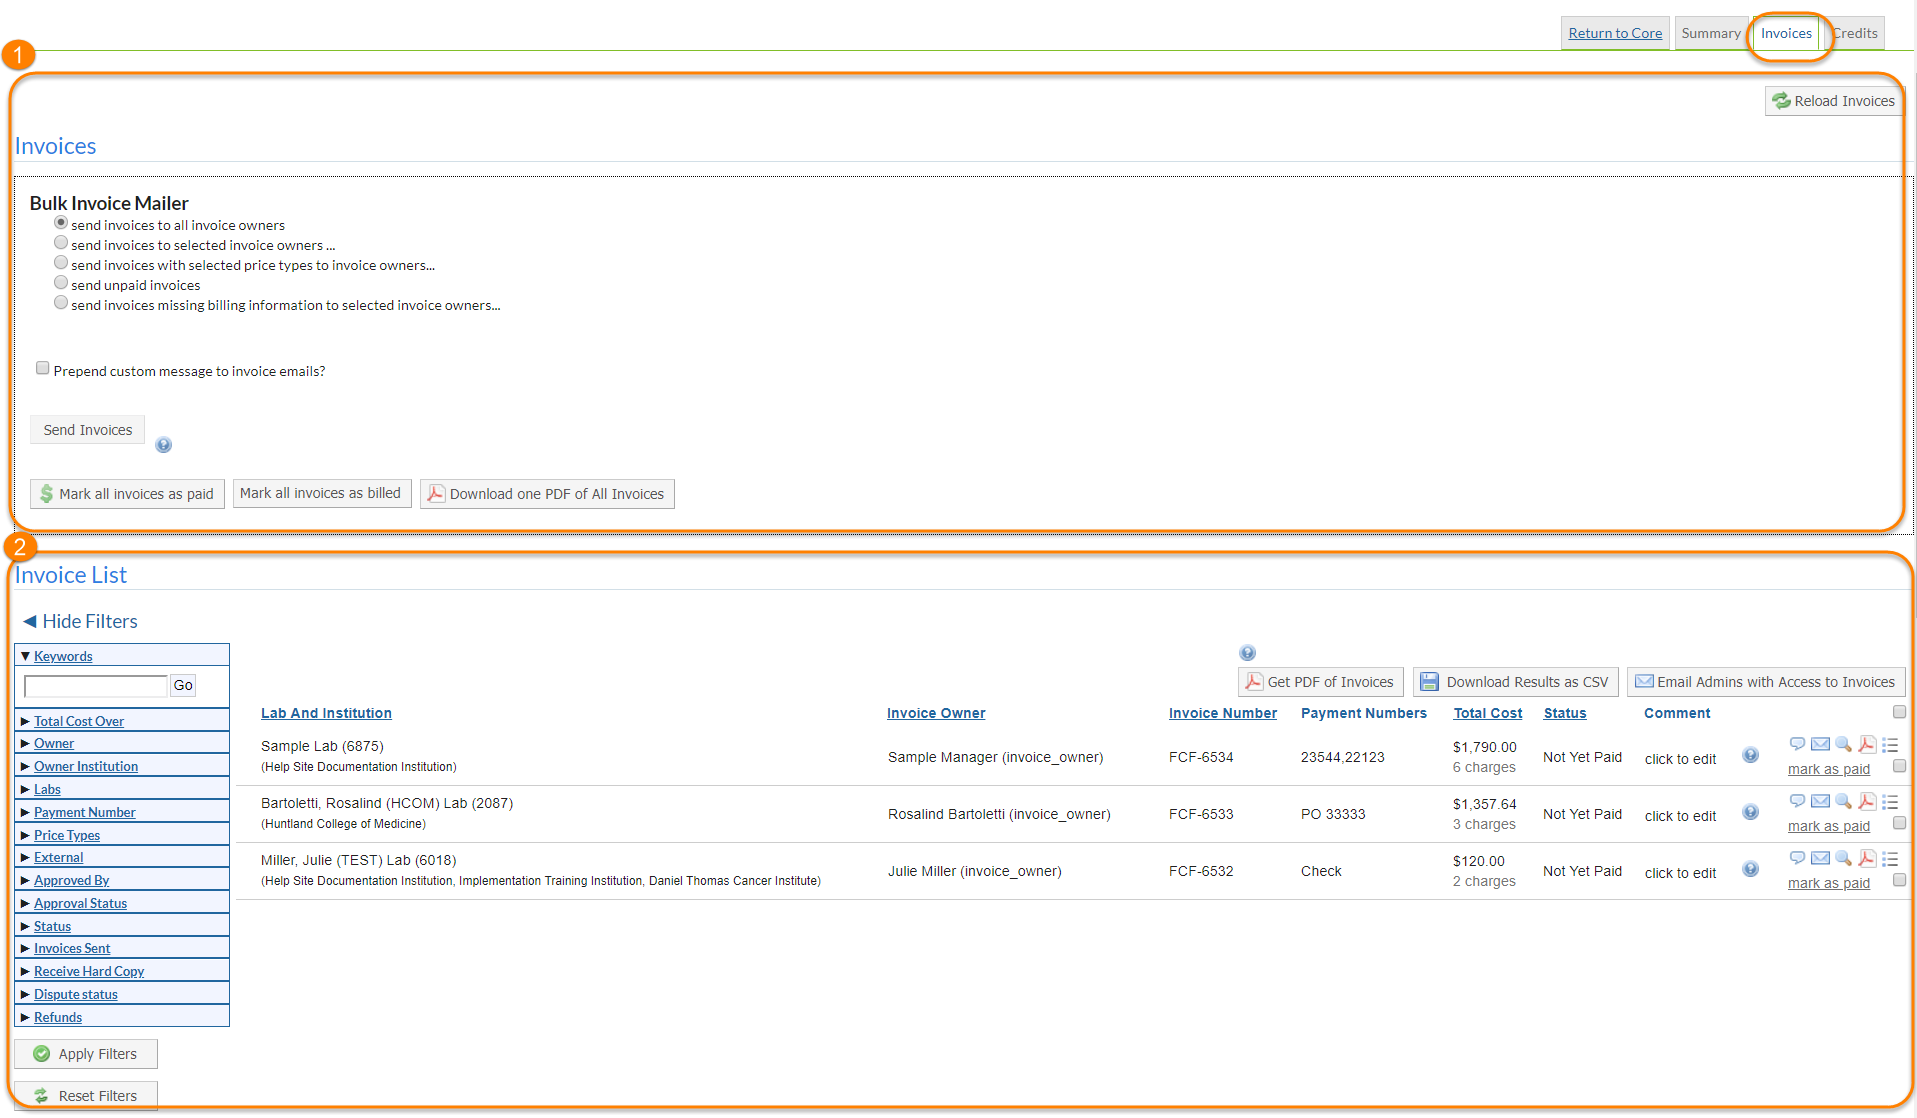
- Bulk Invoice Mailer: This is the area where you can choose who should receive a copy of the invoice and have the ability to bulk email the invoices.
- Invoice List: Shows a list of all invoices that are part of the billing event. Invoices can be viewed individually and managed from this view.
Invoice List
Before sending invoices, you will want to review the invoice list to make sure no changes need to be made. There are a few bulk actions that may be taken on an invoice:
- Filters: The filters allow you to pull up invoices within specific parameters. Click on the arrow to the left of the name to see the options, select how you would like to filter an click 'Apply Filters'.
- Bulk Action buttons: Allow you to get PDF of Invoices, download all invoices as .csv data, and email admins with access to this invoices.
- Invoice Checkboxes: Prior to the above action buttons working, you must select the invoices you wish to include. Check the box next to the invoice(s), or click the top box to select all.
Invoice Actions

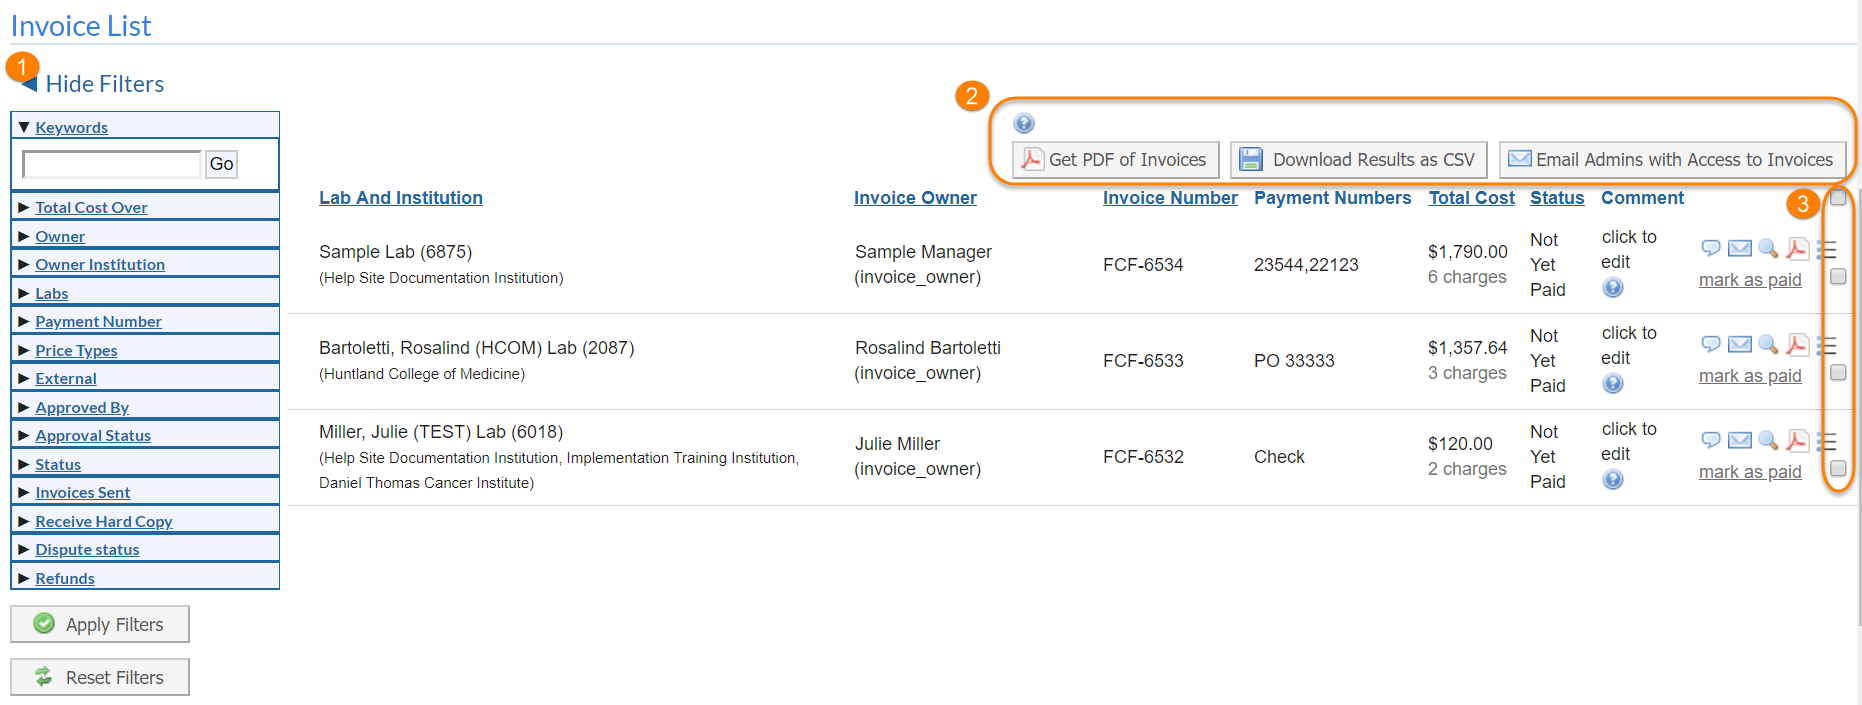
- Lab and Institution: This area tells you which Lab and Institution the invoice is for.
- Invoice Owner: This is the person that the invoice will be sent to. You can click over the name of the person and a list of all possible invoice owners will display. You can select a new invoice owner if the person listed is incorrect.
- Invoice Number: This is an auto generated unique number generated by iLab. The beginning of the invoice number defaults to core initials but can be modified in the Invoices Settings.
- Payment Numbers: The payment number(s) selected to pay the invoice.
- Total cost: This is the total cost of the invoice.
- Status: Invoices can have a status of Paid, Not Yet Paid, or Partially Paid (only shown when no charge or not billable items are included on the invoice).
- Comment: Clicking over the "click to edit" text allows you to enter a free text comment that will show on the invoice list view. It is recommended to keep the comment to 25 characters or less for space.
-
Action Icons:
- Comment (text bubble icon): Clicking on the comment bubble allows for you to enter a comment that is visible when viewing an invoice.
- Send (envelope icon): The envelope icon is open if the invoice has been sent to your customer via email. Click this button to send an individual invoice.
- View (magnifying glass icon): Click here to see the Invoice Detail. This invoice is interactive and you do have the ability to update payment information.
- PDF (pdf icon): You may save a version of the online invoice as a pdf.
-
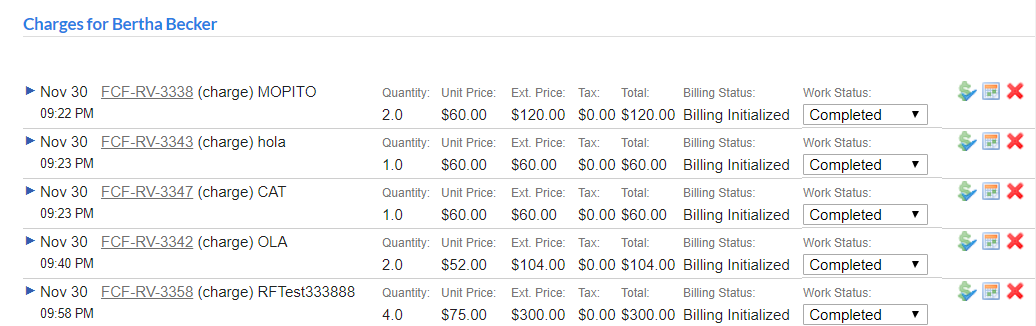
Charges (bullet list icon): If you select to view a list of the invoice charges, the individual charges will display at the bottom of the screen. Note that you may also take actions on the individual charges here: You may change Fund/Payment Information update payment info (dollar sign icon), adjust the dates (clicking on the calendar icon), and delete a charge (red X).
- Mark as paid: If you mark the bill as paid, the status will change to "paid"
Sending Invoices
Once all invoices are reviewed, you are now ready to send your selected invoices. You can send invoices via the envelope icon one by one, or you can use the bulk invoice mailer shown below.
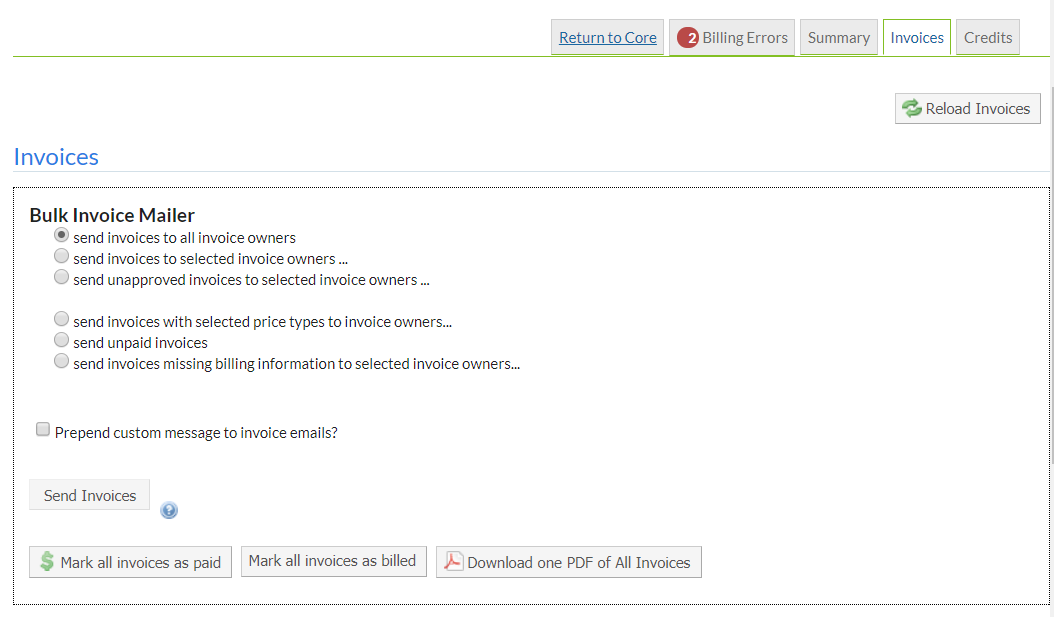
- Bulk Invoice Mailer: Select who invoices will be sent to.
- Prepend custom message to invoice emails? Check box to attach a message to the top of each invoice. A blank text field will open for your message. These messages can also be set by default under the Administration Tab > Other Settings > Invoices section of your core.
- Send Invoices: Clicking this button will send invoices to all of the people you have selected above.
- Mark all invoices as paid: Click this button to mark all of the invoices as paid
- Mark all invoices as billed: Click this button to mark all invoices as billed.
- Download one PDF of All Invoices: Click this button to receive an email containing a PDF of all invoices.